

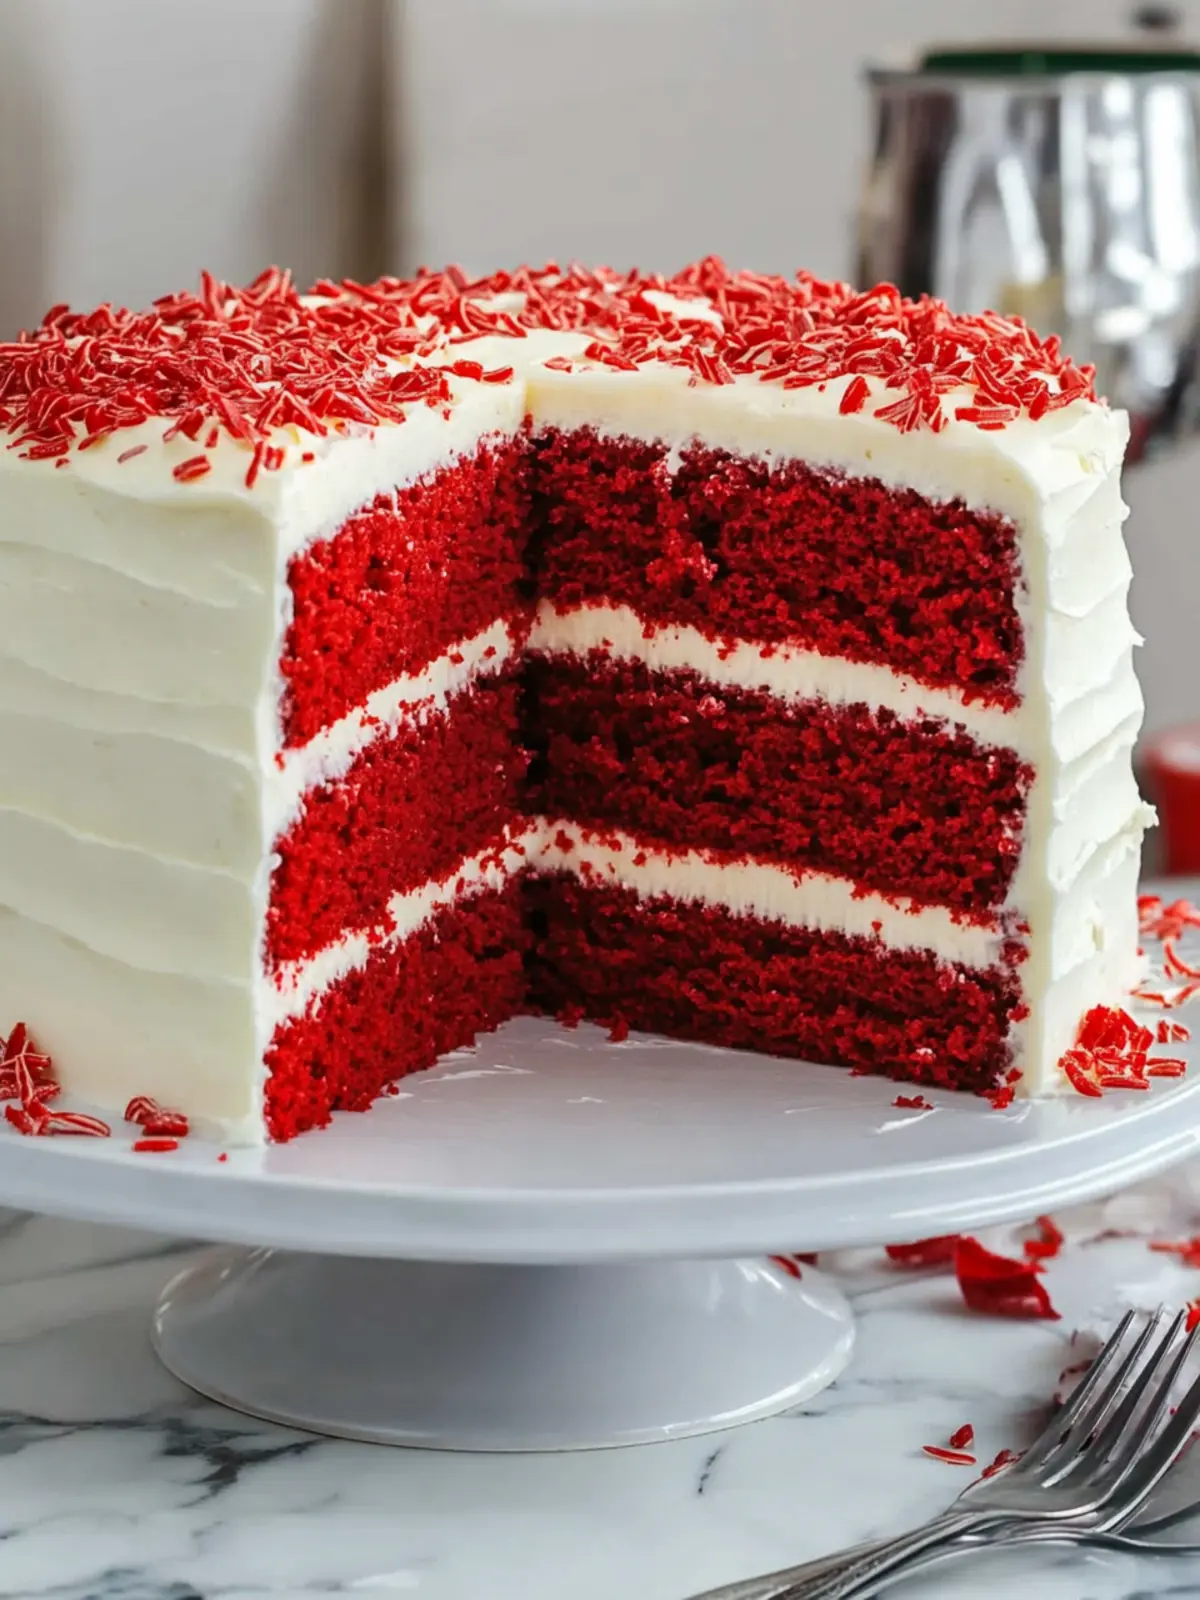
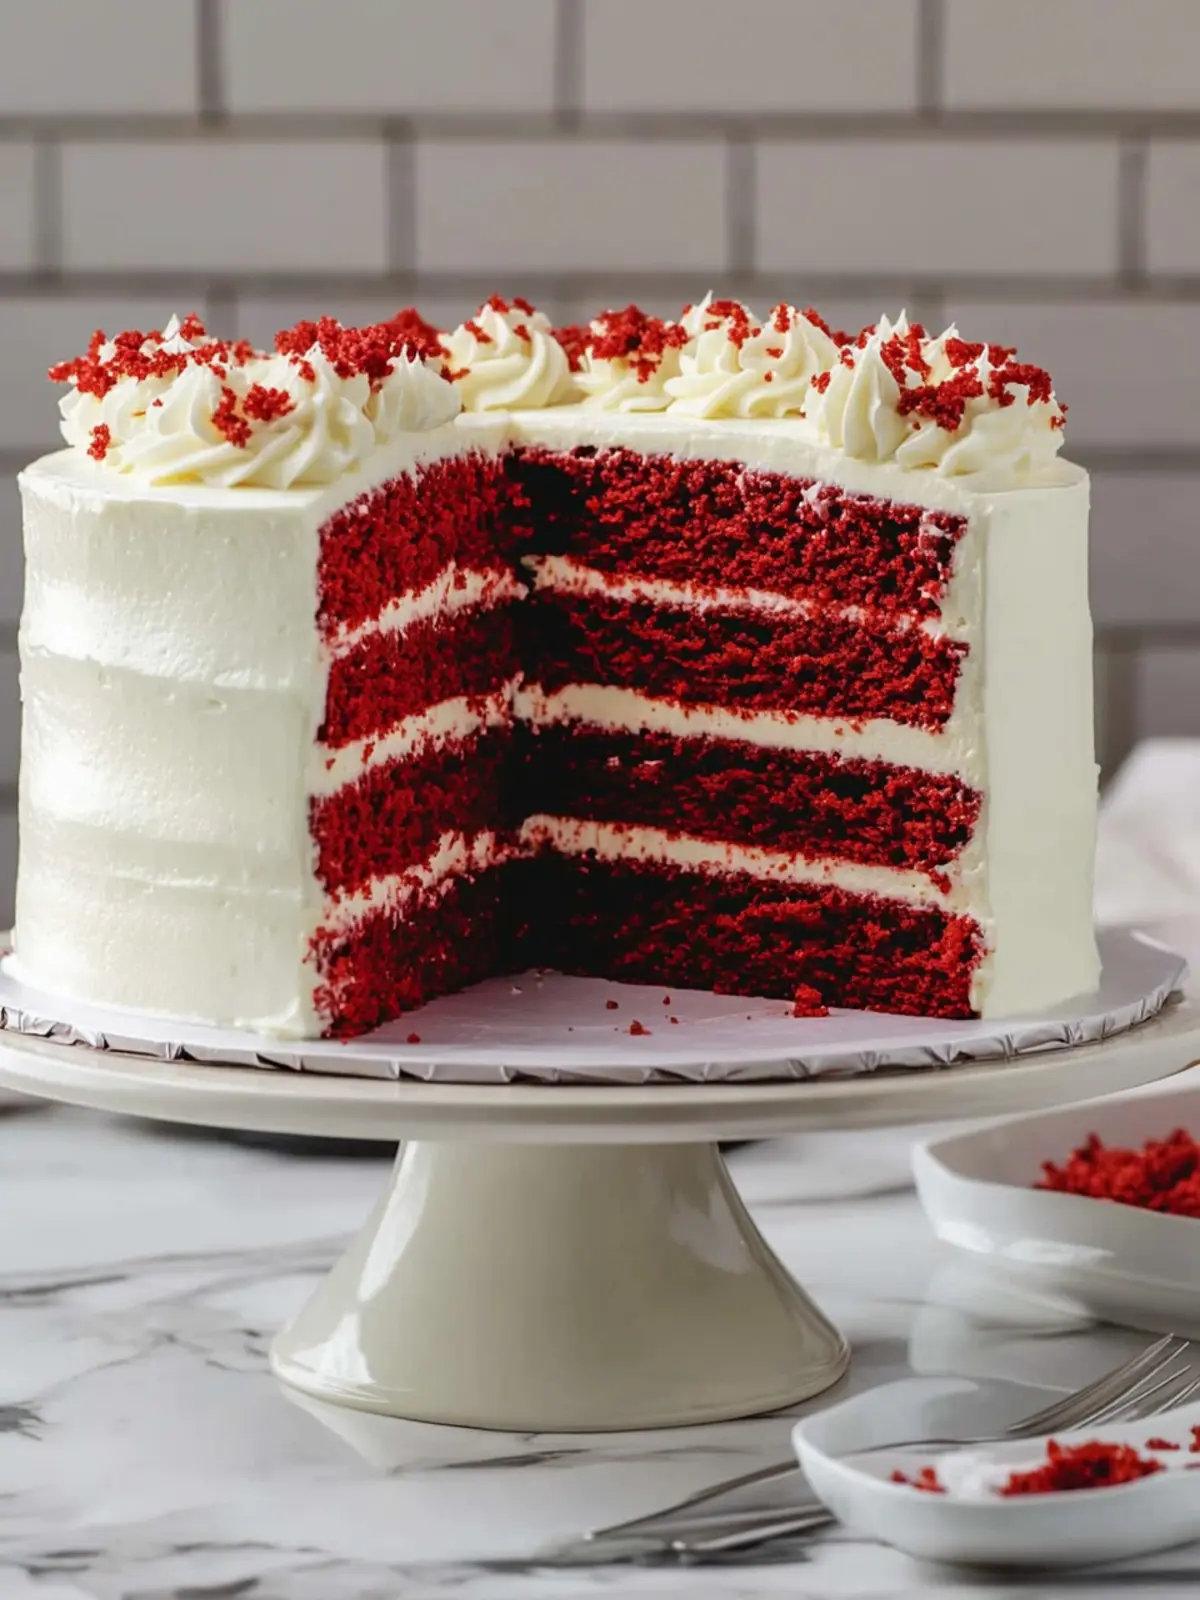
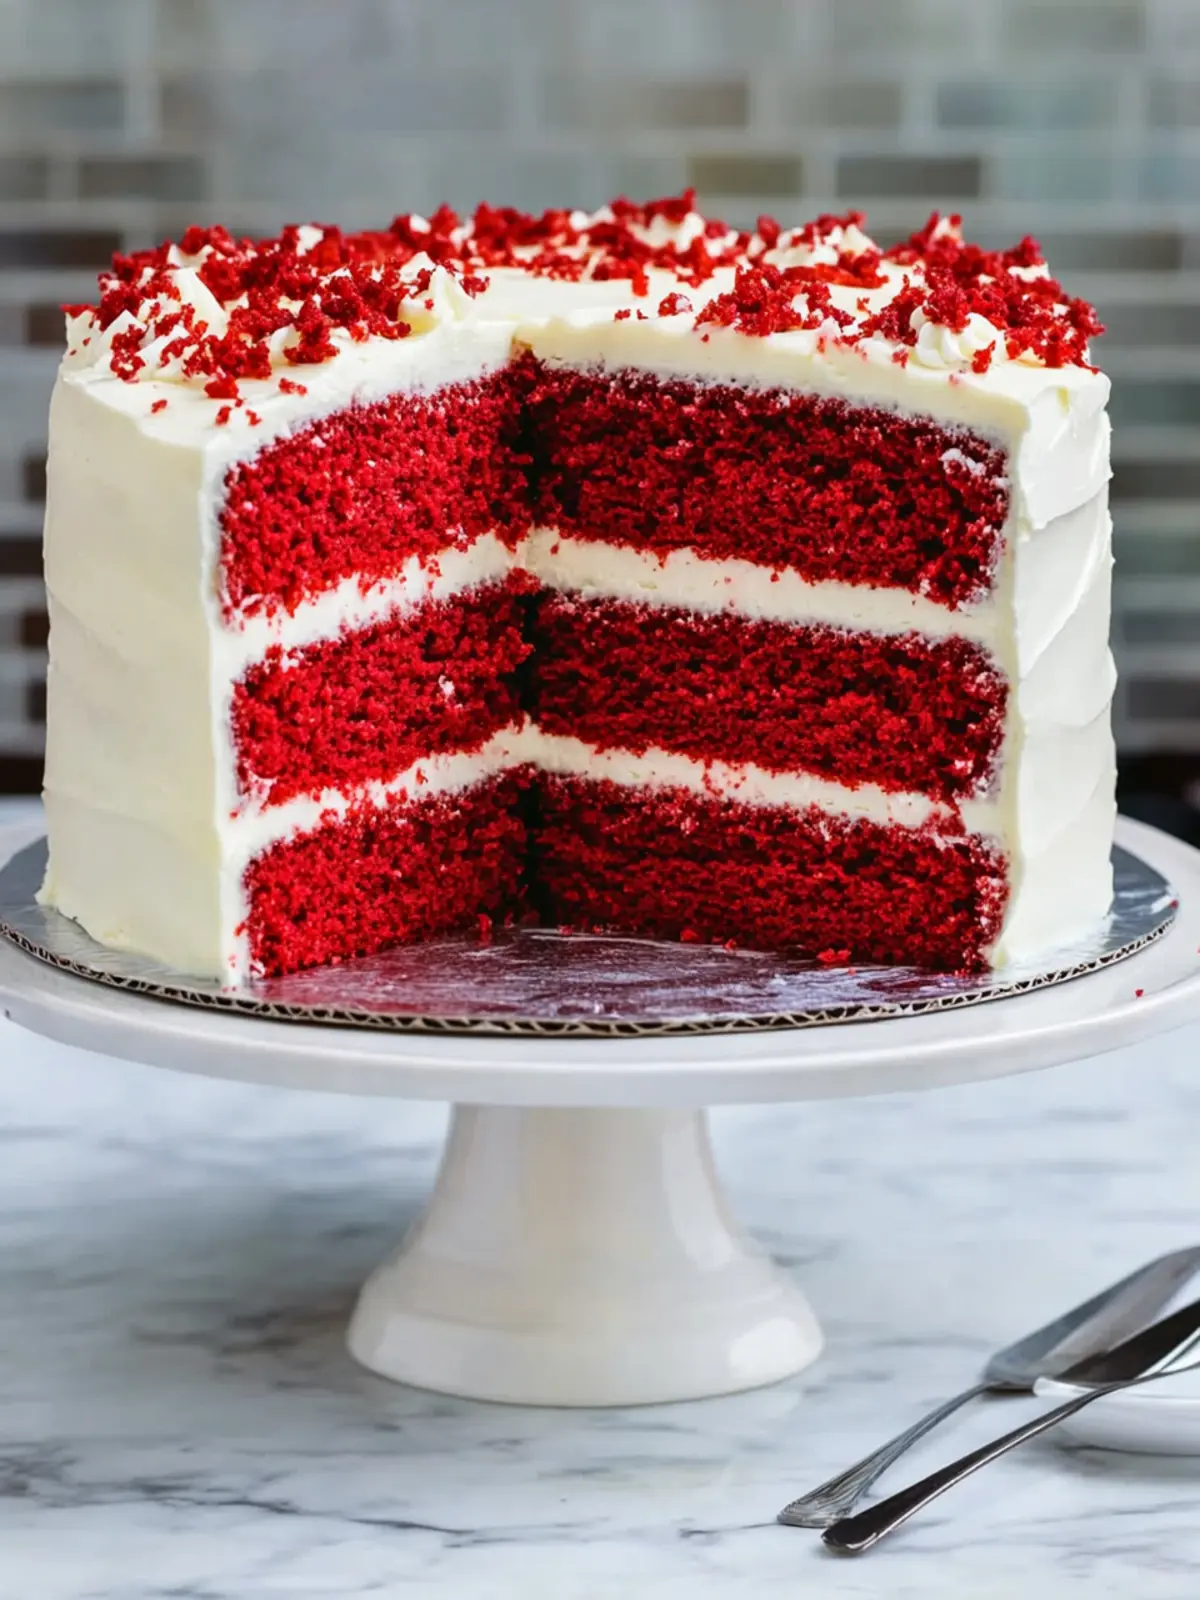
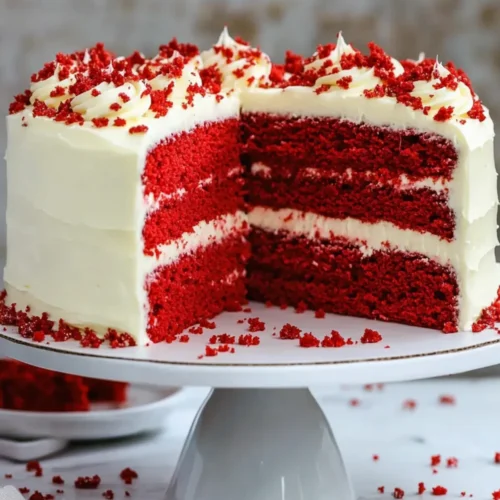
There’s nothing quite like the moment when you cut into a beautifully layered cake, revealing its rich, crimson interior. My journey with this Classic Red Velvet Layer Cake with Cream Cheese Frosting began on a rainy afternoon when I craved something special, something that would lift my spirits. The vibrant color and luscious texture of this cake seemed like the perfect antidote.
As the aroma of the baking cake filled my kitchen, I felt transported to a bake shop, where every slice is a celebration. The combination of tangy cream cheese frosting and moist, fluffy cake layers creates a symphony of flavors that dance on your palate, making it impossible to have just one slice.
Whether you’re planning a birthday bash or a cozy gathering, this cake is sure to steal the show. Join me as I guide you through this delightful recipe, complete with options for different cake sizes, so you can impress your loved ones with a confection that’s as stunning as it is delicious!
Why is Classic Red Velvet Layer Cake irresistible?
Irresistible, indulgent treat: This Classic Red Velvet Layer Cake is a showstopper with its stunning appearance and delightful flavors. Moist and fluffy layers melt in your mouth, complemented by a rich and tangy cream cheese frosting. Versatile sizing options let you customize the cake for any occasion, whether it’s a small gathering or a grand celebration. For those seeking a twist, you can easily turn the batter into cupcakes! With this cake in your baking repertoire, you’re sure to impress family and friends.
Ingredients for Classic Red Velvet Layer Cake
For the Cake
• Vegetable or Canola Oil – Provides moisture and a fluffy texture; substitute with melted coconut oil for a different flavor.
• Buttermilk – Contributes to the cake’s tenderness and slight tang; can substitute with milk mixed with a teaspoon of vinegar for a similar effect.
• Large Eggs – Essential for structure and moisture; ensure they are at room temperature for better incorporation.
• Vanilla Extract or Vanilla Bean Paste – Adds flavor and aroma; can replace with almond extract for a unique taste.
• White Vinegar – Reacts with baking soda for leavening; can substitute with lemon juice if unavailable.
• Red Gel Food Coloring – Creates the distinct red color of the classic red velvet layer cake; liquid food coloring can be used but may require more for vibrancy.
• Granulated Sugar – Sweetens the cake while helping to maintain moisture; no specific substitutes mentioned.
• All-Purpose Flour – Provides structure; for gluten-free options, substitute with a 1:1 gluten-free flour blend.
• Unsweetened Cocoa Powder – Adds a slight chocolate flavor; avoid Dutch-processed as it may alter the pH balance.
• Fine Salt – Enhances flavor; no substitutions necessary.
• Baking Soda & Baking Powder – Essential leavening agents to help the cake rise; ensure they are fresh for proper leavening.
For the Frosting
• Unsalted Butter – Provides richness and flavor; can swap with vegan butter for a dairy-free option.
• Full-Fat Cream Cheese – Gives creaminess and tanginess to the frosting; light cream cheese can be used but will yield a softer frosting.
• Powdered Sugar – Sweetens the frosting while helping to reach the desired texture; no substitutes necessary.
• Heavy Whipping Cream – Used to adjust frosting consistency; milk can be used in a pinch but will yield a thinner frosting.
How to Make Classic Red Velvet Layer Cake
- Preheat the oven to 350°F (175°C) and prepare three 6-inch cake pans by greasing them; this helps the cakes release easily after baking.
- Whisk together the oil, buttermilk, eggs, vanilla, vinegar, and red gel food coloring in a mixing bowl until well combined, creating a luscious mixture.
- Slowly add the granulated sugar to the mixture, whisking for about 30 seconds until completely dissolved to ensure a sweet, flavorful base.
- Combine the dry ingredients—flour, cocoa powder, salt, baking soda, and baking powder—into the wet mixture until smooth; avoid overmixing to keep the cake tender.
- Divide the batter evenly among the prepared pans and bake for 27-30 minutes; check for doneness with a toothpick inserted in the center—it should come out clean.
- Cool the cakes in the pans for 15 minutes, then carefully remove them and let them cool completely on a wire rack—this prevents sogginess.
- Beat together the unsalted butter and cream cheese for the frosting until smooth, then gradually mix in powdered sugar and heavy cream until you achieve a creamy consistency.
- Assemble the cake by stacking the layers with cream cheese frosting between each one, apply a thin coating around the sides, and chill the cake for easier frosting.
- Frost the cake with a thicker layer of cream cheese frosting, decorating the top and sides as desired, and consider adding reserved crumbled cake for an elegant touch.
Optional: Add fresh berries on the side for a delightful contrast of flavors.
Exact quantities are listed in the recipe card below.
Expert Tips for Classic Red Velvet Layer Cake
Room Temperature Ingredients: Ensure all your ingredients, especially eggs and buttermilk, are at room temperature for a smoother batter and better cake texture.
Avoid Overmixing: Mix the batter just until smooth after adding flour; overmixing can lead to a dense cake instead of the light and fluffy texture you desire.
Level Your Layers: Use a serrated knife to level the tops of your cooled cake layers before stacking; this ensures a stable and beautiful layer cake.
Chill the Layers: Chilling the cake layers for about 30 minutes before frosting them makes assembly easier and keeps the frosting neat.
Storage Tips: Keep leftover frosting in the fridge for up to two weeks or freeze it for up to a month; this way, you can enjoy the flavors of your Classic Red Velvet Layer Cake even longer!
Classic Red Velvet Layer Cake Variations
Unlock your creativity and make this cake your own with delightful variations that will tantalize your taste buds.
Gluten-Free: Use a 1:1 gluten-free flour blend to accommodate gluten sensitivities while still keeping the cake moist.
Cupcake Twist: For a fun variation, pour the batter into cupcake liners and bake for 18-21 minutes for delightful mini cakes.
Flavor Infusion: Add a teaspoon of almond extract or orange zest to the batter for an unexpected twist that adds a burst of flavor.
Chocolate Indulgence: Swap out some of the cocoa powder for melted dark chocolate to elevate this cake into a rich chocolate red velvet.
Dairy-Free Delight: Replace butter and cream cheese with dairy-free alternatives, using coconut cream for a luscious frosting that everyone can enjoy.
Frosting Options: Experiment with a chocolate or vanilla buttercream frosting instead of cream cheese for a different flavor profile that’s equally delicious.
Nutty Crunch: Incorporate finely chopped pecans or walnuts into the batter for added texture and a delightful crunch with every bite.
Spiced Delight: Add warm spices like cinnamon or nutmeg to the batter for an extra layer of flavor that complements the chocolate notes beautifully.
Make Ahead Options
These Classic Red Velvet Layer Cake with Cream Cheese Frosting components are perfect for busy home cooks looking to save time! You can bake the cake layers up to 3 days in advance; simply cool them completely, wrap tightly in plastic wrap, and refrigerate. For longer storage, freeze the layers for up to 1 month—just ensure they are well wrapped to prevent freezer burn. The cream cheese frosting can also be prepared 24 hours ahead; store it in an airtight container in the refrigerator. When you’re ready to serve, let the layers come to room temperature, frost the cake, and enjoy a luscious dessert that’s just as delicious as if it were freshly made!
Storage Tips for Classic Red Velvet Layer Cake
Fridge: Store the frosted cake in an airtight container, where it will stay fresh for up to one week. Just be sure to keep it covered to maintain its delicious moisture.
Freezer: Wrap un-frosted layers tightly in plastic wrap and aluminum foil, allowing for freezing up to a month. When ready to enjoy, simply thaw overnight in the fridge before frosting.
Leftover Frosting: Any extra cream cheese frosting can be stored in the fridge for up to two weeks. For longer storage, freeze it in an airtight container for up to a month, ensuring the delicious flavor of the frosting remains intact.
Reheating: If you’ve chilled your cake and want to enjoy it at room temperature, allow it to sit out for about 30 minutes before slicing. This brings out the cake’s moist texture and rich flavors.
What to Serve with Classic Red Velvet Layer Cake?
There’s nothing quite like pairing a luscious cake with complementary flavors and textures to create a celebratory feast.
Fresh Berries: The tartness of berries like raspberries or strawberries cuts through the cake’s richness, adding a refreshing twist. Their bright color also elevates the cake’s vibrant appearance.
Vanilla Ice Cream: A scoop of creamy vanilla ice cream provides a delightful contrast to the warm, cake layers and enhances their richness. The cold ice cream slowly melts into the cake, creating a blissful harmony.
Coffee or Espresso: Serve with a rich cup of coffee or espresso to balance the sweetness of the cake. The warm notes of coffee enhance the cocoa flavors, making each bite even more enjoyable.
Chocolate Ganache Drizzle: For the ultimate indulgence, drizzle some chocolate ganache over each slice. The luxurious chocolate ties the cake’s flavors together, offering an extra layer of richness.
Creamy Whipped Topping: A dollop of lightly sweetened whipped cream adds a delightful airy touch. Its lightness contrasts beautifully with the dense layers of the cake, making each bite feel like a celebration.
Mint Leaves: A few sprigs of fresh mint not only brighten the presentation but also lend a refreshing flavor that balances the cake’s sweetness. Mint brings a touch of elegance to your dessert table.
Chilled Sparkling Wine: Pair your slice with a glass of sparkling rosé or prosecco for a festive gesture. The bubbles cleanse the palate and enhance the joyous experience of enjoying cake with friends and family.
Classic Red Velvet Layer Cake with Cream Cheese Frosting Recipe FAQs
What type of oil should I use for the cake?
For the Classic Red Velvet Layer Cake, I recommend using vegetable or canola oil as they provide the necessary moisture and create a fluffy texture. If you’re looking for a different flavor profile, melted coconut oil can also be a great substitute!
How should I store the frosted cake?
Store the frosted cake in an airtight container in the refrigerator for up to one week. This keeps the cake fresh and prevents it from drying out. Make sure to cover it well to maintain its delightful moisture and flavor!
Can I freeze the cake layers?
Absolutely! To freeze the un-frosted layers, wrap them tightly in plastic wrap followed by aluminum foil to prevent freezer burn. They can be stored in the freezer for up to a month. When you’re ready to enjoy, simply thaw them overnight in the fridge before frosting and serving.
What should I do if my cake layers dome up while baking?
If you find that your cake layers are doming, don’t worry! This is quite common. To easily resolve this, simply use a serrated knife to level them off after they have cooled. This step not only helps in stacking but also ensures each slice looks fabulous!
Are there any dietary considerations with this recipe?
Yes! If you’re considering dietary restrictions, you can substitute the unsalted butter in the frosting with vegan butter for a dairy-free option. Moreover, ensure to use a 1:1 gluten-free flour blend in place of all-purpose flour if you’re catering to gluten sensitivities.
How can I tell if my cake is done baking?
The best way to check for doneness is to insert a toothpick into the center of the cake. If it comes out clean or with only a few crumbs attached, your Classic Red Velvet Layer Cake is perfectly baked!
Decadent Classic Red Velvet Layer Cake with Cream Cheese Frosting
Equipment
- - Mixing bowl
- Whisk
- Cake Pans
- - Wire rack
Ingredients
Cake Ingredients
- 1 cup Vegetable or Canola Oil Can substitute with melted coconut oil.
- 1 cup Buttermilk Can substitute with milk mixed with a teaspoon of vinegar.
- 2 Large Eggs Ensure they are at room temperature.
- 1 teaspoon Vanilla Extract Can replace with almond extract.
- 1 teaspoon White Vinegar Can substitute with lemon juice.
- 2 tablespoons Red Gel Food Coloring Liquid food coloring can be used.
- 1.5 cups Granulated Sugar
- 2.5 cups All-Purpose Flour Can use gluten-free flour blend.
- 2 tablespoons Unsweetened Cocoa Powder Avoid Dutch-processed.
- 1 teaspoon Fine Salt
- 1 teaspoon Baking Soda
- 1 teaspoon Baking Powder
Frosting Ingredients
- 1 cup Unsalted Butter Can substitute with vegan butter.
- 8 oz Full-Fat Cream Cheese Light cream cheese can be used but will yield a softer frosting.
- 4 cups Powdered Sugar
- 1/4 cup Heavy Whipping Cream Milk can be used but yields a thinner frosting.
Instructions
Cake Preparation
- Preheat the oven to 350°F (175°C) and prepare three 6-inch cake pans by greasing them.
- Whisk together the oil, buttermilk, eggs, vanilla, vinegar, and red gel food coloring in a mixing bowl until well combined.
- Slowly add the granulated sugar to the mixture, whisking for about 30 seconds until completely dissolved.
- Combine the dry ingredients—flour, cocoa powder, salt, baking soda, and baking powder—into the wet mixture until smooth; avoid overmixing.
- Divide the batter evenly among the prepared pans and bake for 27-30 minutes; check for doneness with a toothpick.
- Cool the cakes in the pans for 15 minutes, then carefully remove them and let them cool completely on a wire rack.
Frosting and Assembly
- Beat together the unsalted butter and cream cheese for the frosting until smooth, then gradually mix in powdered sugar and heavy cream.
- Assemble the cake by stacking the layers with cream cheese frosting in between; apply a thin coating around the sides.
- Frost the cake with a thicker layer of cream cheese frosting, decorating the top and sides as desired.