
As graduation approaches, I find myself swept up in the nostalgic waves of celebration and joy. The thrill of cap and gown, the scent of a freshly baked cookie, and the laughter of friends and family gathering for a milestone moment are all intertwined, reminding me of my own journey. This graduation cookie cake recipe is a delightful way to honor those achievements, combining sweetness and creativity in a treat that’s equal parts delicious and heartwarming.
While I was testing this recipe, I couldn’t help but smile at how it transforms simple ingredients into edible graduation caps and diplomas. It’s not just about the cookies; it’s about making memories that you can share with your loved ones. Ideal for parties or as a thoughtful gift, these cookies are both personable and indulgent, offering a delicious escape from fast food monotony. Grab your baking apron and let’s create something to celebrate progress and new beginnings together!
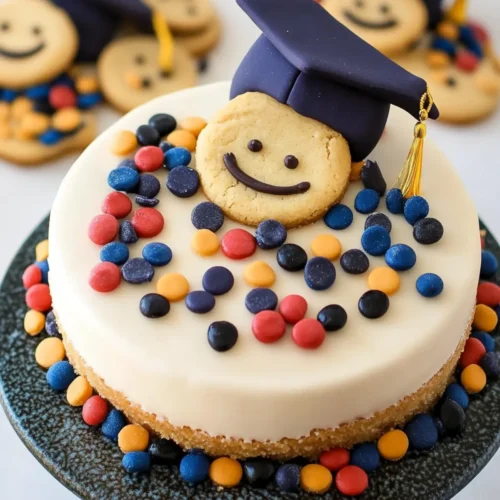
Why will you love this graduation cookie cake recipe?
Delightful Creativity: These cookies transform into adorable grad caps and diplomas, making them perfect for celebrations.
Easy Instructions: With straightforward steps, you don’t need to be a professional baker to impress your guests.
Flavorful Base: The sweet buttery dough paired with rich white chocolate makes each cookie irresistible.
Customizable Colors: Use different food colorings to match your school’s theme, adding a personal touch.
Perfect for Sharing: These cookies are not just treats; they’re a way to create cherished memories with friends and family.
Ideal for adding a sweet twist to your graduation festivities!
Graduation Cookie Cake Recipe Ingredients
Get ready to celebrate with these delightful treats!
For the Cookie Dough
- 2 cups all-purpose flour – Helps create a sturdy base for your graduation cookies.
- ¼ teaspoon salt – Enhances the flavor of the sweet dough.
- ¼ teaspoon baking powder – Aids in giving the cookies a perfect rise.
- ½ cup butter – Use softened butter for a creamy texture.
- ¾ cups sugar – Sweetens the dough to make it irresistibly delicious.
- 1 large egg – Binds the ingredients together for a tender bite.
- ¾ teaspoons pure vanilla extract – Adds a warm, aromatic flavor to the cookies.
- ½ teaspoon almond extract – Provides a lovely nutty hint that complements the cookie base.
For Decorating
- 16 ounces white chocolate – The key element for a rich, creamy coating on your cookies.
- ⅓ cup light corn syrup – Acts as a glue for attaching the decorations.
- Food coloring – Flesh tone and additional colors for your grad caps, offering a personal touch to your treats!
Whether you’re crafting for a friend’s graduation or your own, this graduation cookie cake recipe will elevate your celebration.
How to Make Graduation Cookies
Preheat your oven to 350°F. This warm-up is crucial for achieving that perfect cookie texture, so don’t skip this step!
Combine the flour, salt, and baking powder in a bowl. Mix well to ensure even distribution, then set this mixture aside for a moment.
Cream the softened butter and sugar together until the mixture is light and fluffy. This should take about 2-3 minutes, creating a lovely base for your cookies.
Incorporate the egg, vanilla extract, and almond extract into the butter-sugar blend. Stir until all the ingredients are nicely mixed and the batter appears smooth.
Mix in the dry ingredients gradually, stirring just until combined. Remember, if the dough feels a bit sticky, add a dusting of flour to make it easier to handle.
Roll out the dough on a floured surface until it’s about ⅛ inch thick. This thickness will ensure your cookies bake evenly and hold their shape.
Cut out twelve 3-inch circles from the dough using a cookie cutter. Each circle will become the base of your graduation cookie.
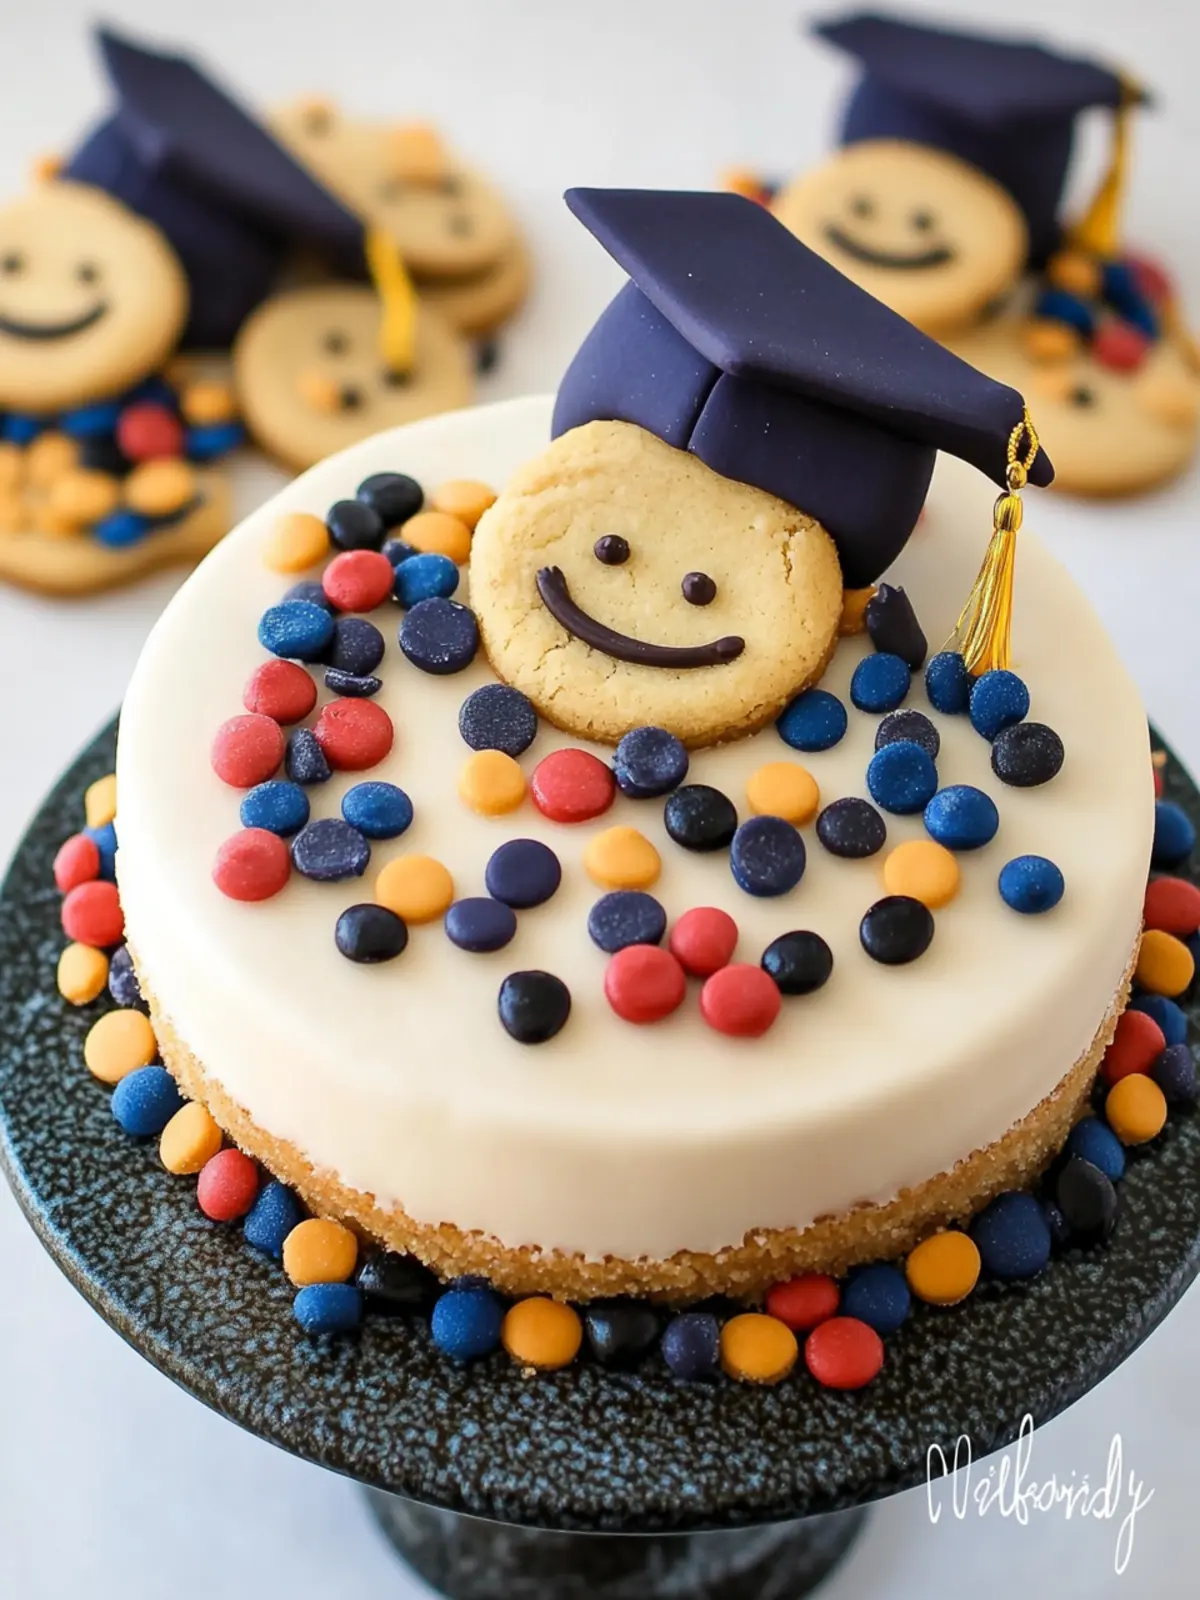
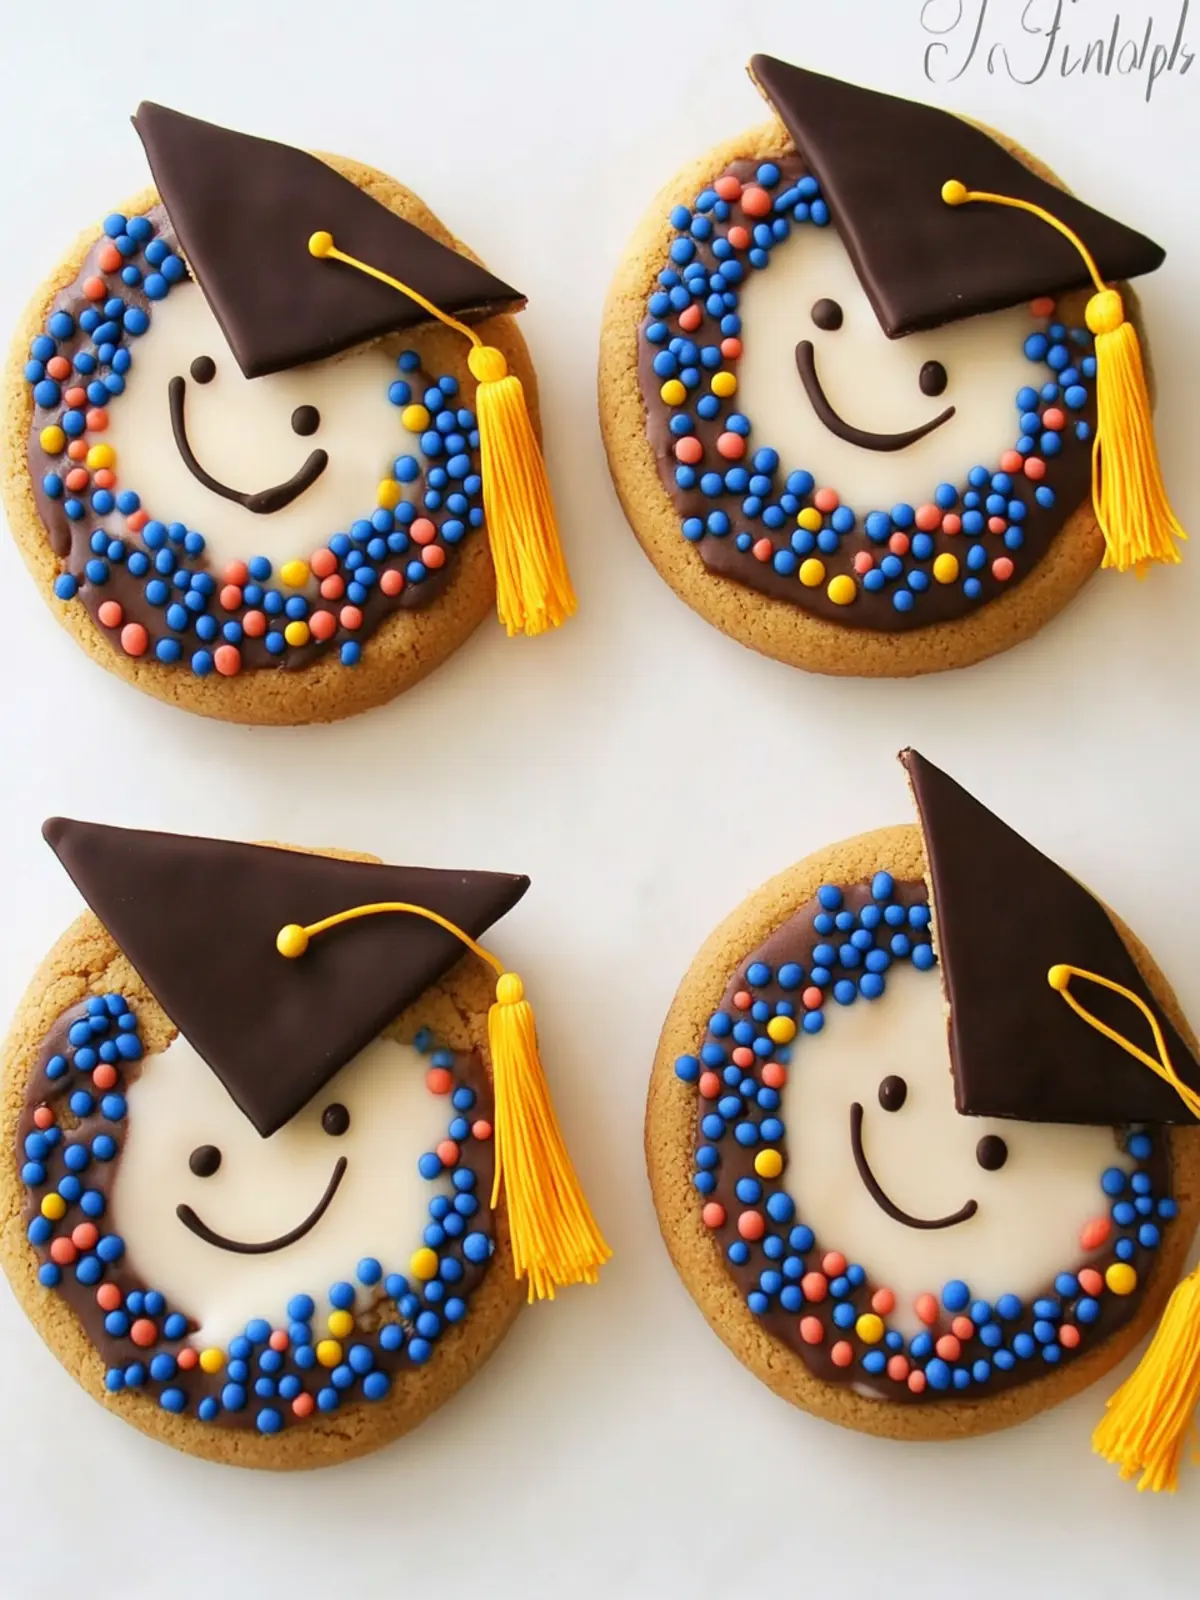
Create twelve diamond-shaped grad caps from the remaining dough. Use the same cookie cutter for a uniform shape.
Notch each circle by cutting a small triangle from the middle. This little cut will allow the grad cap to sit snugly on the cookie.
Attach the diamond-shaped dough to each circle by brushing two edges with corn syrup. Press the seams together gently to secure them in place.
Bake the cookies for 10-14 minutes until the edges are set and the tops are no longer shiny. You want them just golden enough to be inviting.
Cool the cookies completely on a wire rack. This step is crucial for decorating, giving you a perfect canvas to work on.
Reserve about 2 tablespoons of white modeling chocolate to color for the tassels. This small amount will make a big difference in the finished designs.
Color about ⅔ of the white modeling chocolate with flesh tone food coloring, and the remainder for the cap tops. Get creative with these colors to match school themes!
Rest the colored modeling chocolate at room temperature for about 30 minutes before using. This will make it easier to work with as you shape it.
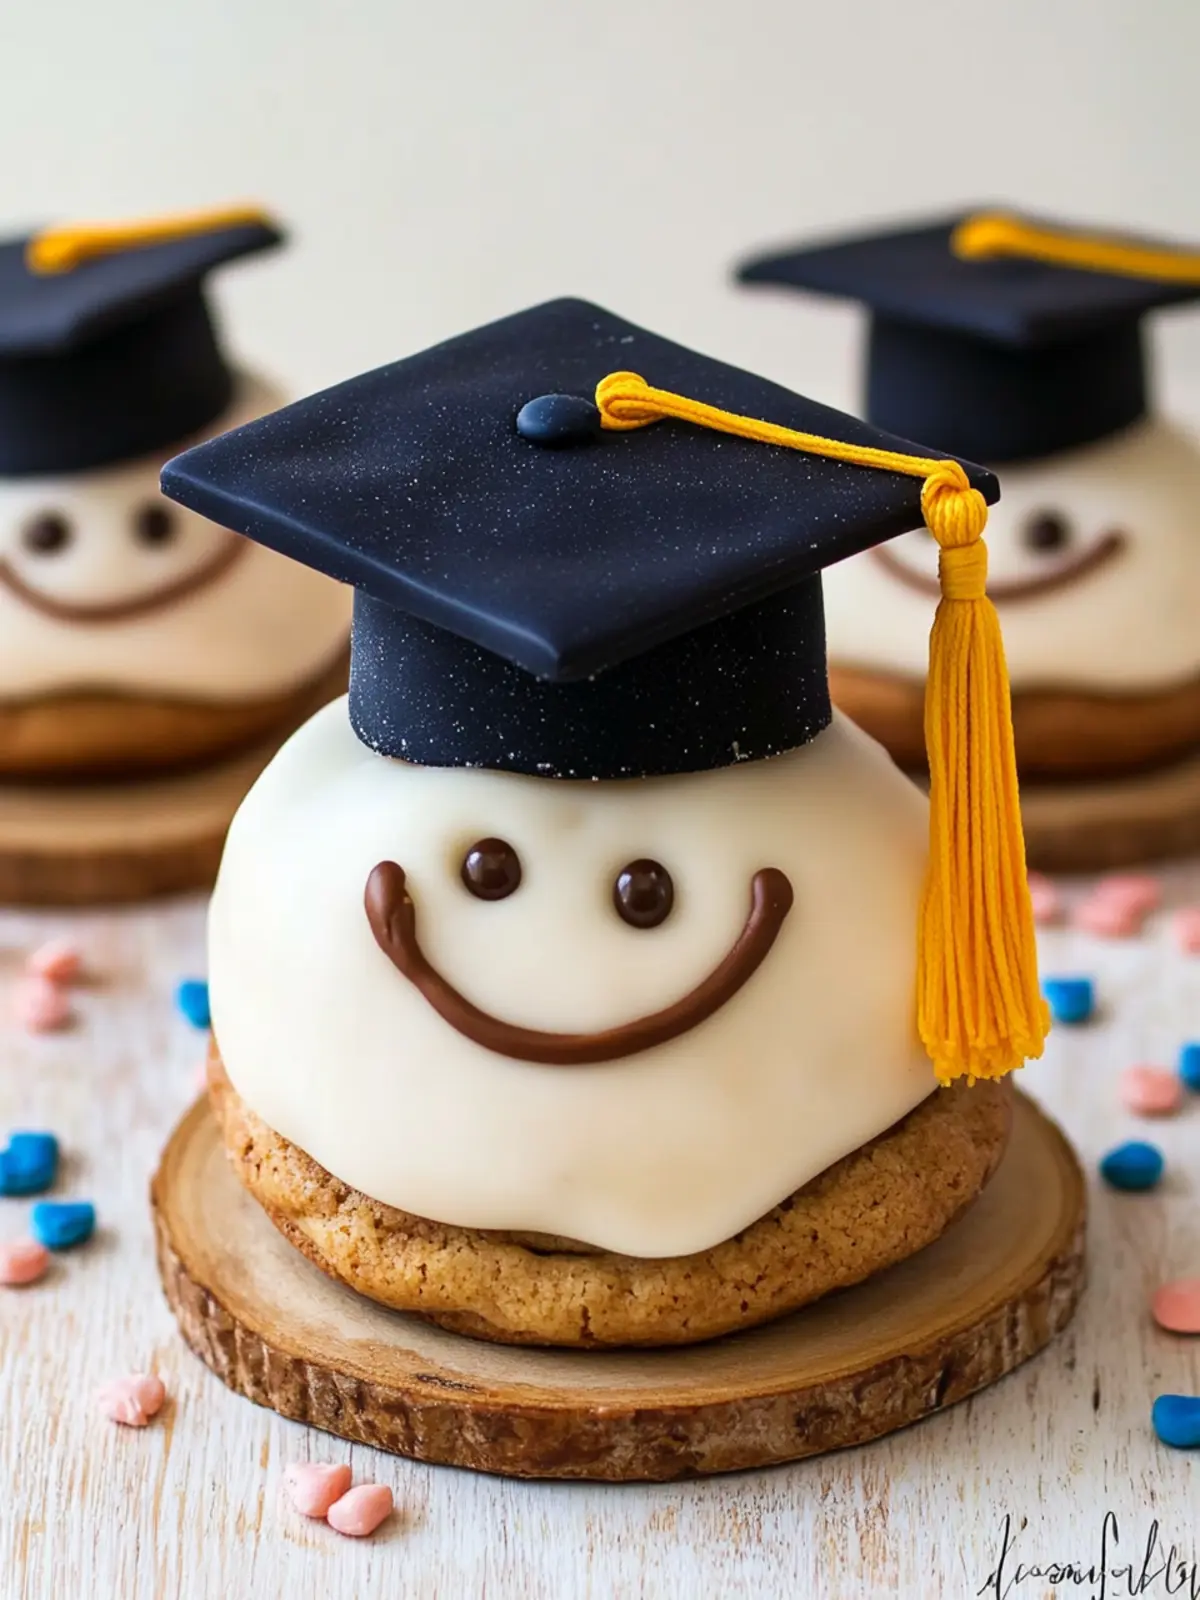
Roll out the flesh tone modeling chocolate to about 1/16th inch thickness. Cut out twelve 3-inch circles—these will be the tops of your diplomas.
Shape the colored modeling chocolate into twelve diamond-shaped grad caps, ensuring they match the dimensions of your cookie for a neat design.
Notch each round circle using the same diamond cutter, just like before. Each cookie will now have a perfect fit for the decor.
Brush a light coating of corn syrup over a cookie, then place the circle and diamond on top, pressing the seams together carefully.
Color your modeling chocolate as needed for the tassels, infusing life into your decorations.
Roll the modeling chocolate into a tube and insert it into a clay extruder. This technique makes it so easy to create those cute tassels!
Extrude a single strand of chocolate, cutting it into twelve 1-inch pieces. These little pieces will be perfect for the tassels on your caps.
Attach the single strand to the center of each grad cap using a dot of corn syrup. A little dab here goes a long way!
Switch to a multi-hole disc on the extruder and push your candy clay through to make lots of little tassel strands. Cut these to ¾ inch long.
Pinch one end of the strands together before attaching them to the single strand at the top of the cap with a bit more corn syrup.
Finalize the tassels by pinching off a small piece of modeling chocolate that matches your grad caps, rolling it into a ball, and flattening it down on the top for that charming look.
Optional: Add colorful sprinkles on top of the grad caps for extra festive flair!
Exact quantities are listed in the recipe card below.
Make Ahead Options
These graduation cookies are perfect for meal prep, allowing you to enjoy the fun of baking without the last-minute stress! You can prepare the cookie dough and cut out the shapes up to 24 hours in advance by storing them in the refrigerator, layered between parchment paper in an airtight container. The fully baked cookies can also be made ahead and kept in an airtight container for up to 3 days at room temperature, maintaining their delightful texture. When you’re ready to decorate, simply melt the chocolate and proceed with the final assembly, ensuring that your cookies are just as delicious and festive as if they were freshly made!
How to Store and Freeze Graduation Cookies
Room Temperature: Store cookies in an airtight container at room temperature for up to 3 days, keeping them fresh and soft for your celebrations.
Fridge: If you need to keep them longer, refrigerate in an airtight container for up to a week. Just remember to bring them to room temperature before serving for optimal flavor.
Freezer: For longer storage, freeze graduation cookies for up to 3 months. Wrap them tightly in plastic wrap and place in a freezer-safe bag to prevent freezer burn.
Reheating: When ready to enjoy, thaw cookies at room temperature or microwave for a few seconds. This will revive their delightful texture just like when they were freshly baked!
Expert Tips for the Best Graduation Cookie Cake Recipe
- Chill Your Dough: Allow the dough to chill for about 30 minutes to prevent it from spreading too much during baking, ensuring beautifully shaped cookies.
- Coloring Technique: When coloring your white chocolate, start with a small amount of food coloring and add more gradually until you achieve your desired shade for the grad caps.
- Avoid Overbaking: Keep a close eye on the cookies in the oven. Remove them once the edges are set to maintain a soft, chewy interior.
- Assemble with Care: When attaching the caps to the cookies, press gently but firmly to avoid cracking the cookie while ensuring a tight fit.
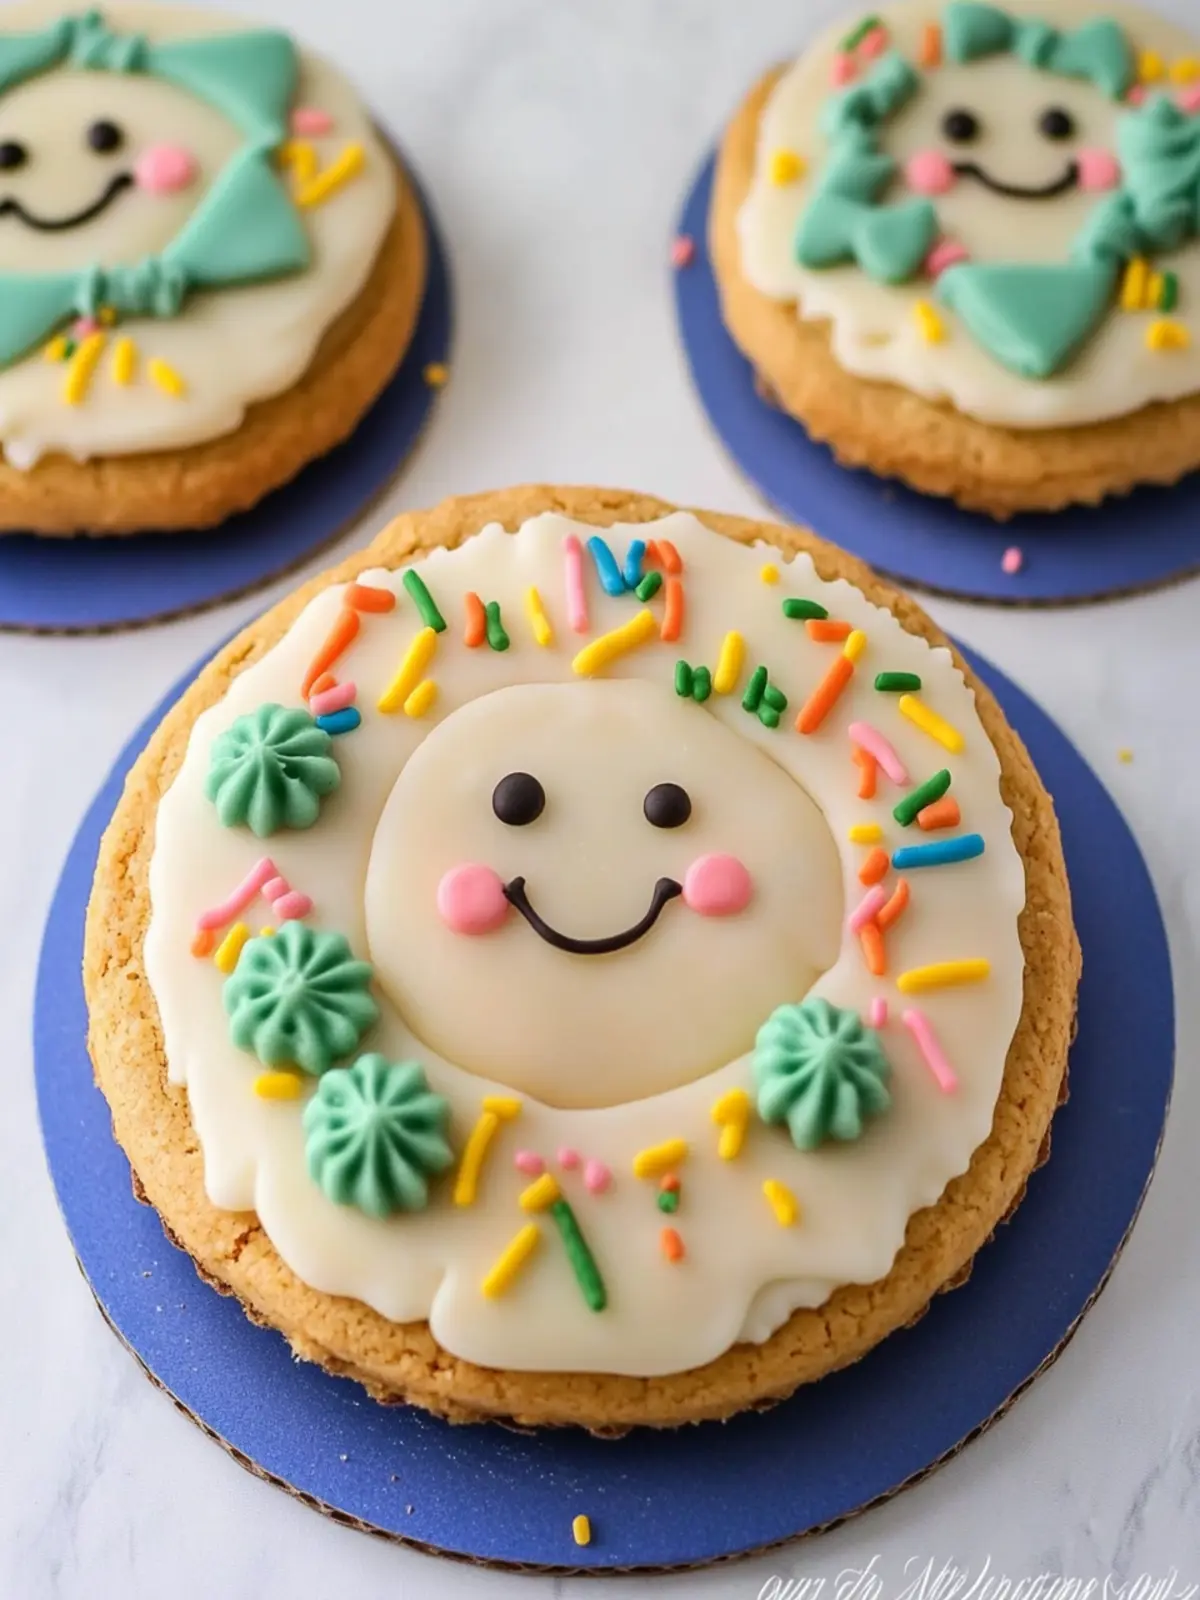
- Creative Decorations: Feel free to add edible glitter or sprinkles to your graduation cookie cake recipe for a festive touch that enhances their appearance!
What to Serve with Graduation Cookies?
Looking to complete your celebration with delightful dishes that elevate the sweet moments?
- Cheesy Garlic Bread: This warm, buttery bread adds a savory balance to the sweet cookies, inviting an irresistible contrast.
- Fresh Fruit Salad: A light and colorful fruit mix provides a refreshing palate cleanser between bites of sugary goodness.
- Sparkling Lemonade: The zesty fizz of lemonade pairs perfectly with the sweet richness of the cookies, adding a festive touch.
- Chocolate-covered Strawberries: These decadent treats provide a touch of elegance and a burst of flavor that complements the graduation theme.
- Mini Caprese Skewers: Juicy tomatoes and fresh basil on skewers add a lovely burst of freshness, enhancing the overall flavor profile.
- Buttercream Frosted Cupcakes: Offering a soft bite and creamy topping, these cupcakes echo the sweetness of the cookies while delighting your guests.
The combination of these delicious options will create a memorable feast that honors your graduate’s achievement!
Graduation Cookie Cake Recipe Variations
Feel free to explore creativity in the kitchen and make this recipe your own with these fun twists!
Gluten-Free: Substitute all-purpose flour with a gluten-free blend and ensure your baking powder is gluten-free.
Baking gluten-free doesn’t mean sacrificing flavor or texture! The joy of these cookies will still shine through.Dairy-Free: Swap out butter for a dairy-free margarine and use a dairy-free chocolate.
These cookies can cater to everyone, ensuring that all sweet teeth are satisfied at your celebration!Flavor Infusion: Experiment with flavored extracts like lemon or coconut in place of almond extract.
Add a burst of unexpected flavor that will surprise and delight your guests, making the cookies truly distinctive.Crunchy Texture: Add ½ cup of finely chopped nuts like walnuts or pecans for an extra crunch.
This addition lends a delightful contrast to the soft cookies while enhancing the festive feel!Colorful Cap Options: Use gel food coloring for vibrant grad cap shades or even edible glitter for a shimmering effect.
Each cookie can tell a story of celebration, enhancing the visual appeal for those special moments!Fruity Twist: Incorporate 1 cup of finely chopped dried fruits, such as cranberries or apricots, into the dough for added sweetness.
The chewy bits of fruit can turn these cookies into a sweet surprise that balances beautifully with the rich chocolate.Spicy Kick: For those who love a bit of heat, add a pinch of cayenne pepper to the dough to create a surprisingly wonderful contrast.
The spice will elevate the flavor profile, making these cookies memorable beyond just the graduation theme!Reduced Sugar: Decrease sugar to ½ cup and replace it with ¼ cup of unsweetened applesauce for a healthier version.
Enjoy a guilt-free treat that still boasts deliciousness, letting you celebrate while staying mindful of sweetness!
Graduation Cookie Cake Recipe FAQs
How do I select the best ingredients for my graduation cookies?
Absolutely! When choosing your ingredients, look for flour that feels fresh and is stored in a cool, dry place. Ensure the butter is softened to room temperature for easy creaming and optimal texture. For the sugars, check if they’re granulated and dry, avoiding any clumps. Lastly, fresh extracts make a significant flavor difference, so only use pure extracts that haven’t expired.
How should I store my graduation cookies?
To keep your cookies fresh, store them in an airtight container at room temperature for up to 3 days. If you need to keep them longer, the fridge works well, allowing you to extend their life up to 1 week. However, to maintain their delicious flavor, allow them to come back to room temperature before serving!
Can I freeze my graduation cookies for later?
Very! Freezing these cookies is an excellent option for long-term storage. You can freeze them for up to 3 months. Here’s how: Wrap each cookie tightly in plastic wrap to prevent freezer burn. Place them in a freezer-safe bag or container. When you’re ready to enjoy, simply thaw them at room temperature for a few hours, or microwave them for a few seconds if you’re in a hurry.
What should I do if my cookie dough is too sticky?
If your dough is sticky, don’t worry! Just sprinkle in a little more flour—about a tablespoon at a time—until it’s manageable. Additionally, chilling the dough in the fridge for 30 minutes can help firm it up and make it easier to roll out.
Are there any dietary considerations I should be mindful of?
Very! If you or your guests have allergies, be cautious with ingredients like almonds, as the almond extract might trigger reactions. I’d also recommend verifying that the food coloring and chocolate you choose are safe for your dietary needs (like gluten-free or nut-free). For pets, it’s crucial to keep all chocolate products far away, as chocolate can be toxic to dogs and cats.
Can I customize the colors of my graduation cookies?
Absolutely! Get creative with your food coloring! You can match your school’s colors by simply adding drops of food coloring until you reach your desired shade. If you’re using gel colors, remember that they are more concentrated, so a little goes a long way! Enjoy the decorating process; it makes the cookies even more special!
Graduation Cookie Cake Recipe for Sweet Celebrations
Equipment
- - Cookie cutter
- - Mixing bowl
- Rolling Pin
- - Baking sheet
- - Wire rack
Ingredients
For the Cookie Dough
- 2 cups all-purpose flour Helps create a sturdy base for your graduation cookies.
- ¼ teaspoon salt Enhances the flavor of the sweet dough.
- ¼ teaspoon baking powder Aids in giving the cookies a perfect rise.
- ½ cup butter Use softened butter for a creamy texture.
- ¾ cups sugar Sweetens the dough to make it irresistibly delicious.
- 1 large egg Binds the ingredients together for a tender bite.
- ¾ teaspoon pure vanilla extract Adds a warm, aromatic flavor to the cookies.
- ½ teaspoon almond extract Provides a lovely nutty hint that complements the cookie base.
For Decorating
- 16 ounces white chocolate The key element for a rich, creamy coating on your cookies.
- ⅓ cup light corn syrup Acts as a glue for attaching the decorations.
- food coloring Flesh tone and additional colors for your grad caps, offering a personal touch to your treats!
Instructions
How to Make Graduation Cookies
- Preheat your oven to 350°F.
- Combine the flour, salt, and baking powder in a bowl. Mix well and set aside.
- Cream the softened butter and sugar together until light and fluffy.
- Incorporate the egg, vanilla extract, and almond extract into the butter-sugar blend.
- Mix in the dry ingredients gradually, stirring just until combined.
- Roll out the dough on a floured surface until it’s about ⅛ inch thick.
- Cut out twelve 3-inch circles from the dough using a cookie cutter.
- Create twelve diamond-shaped grad caps from the remaining dough.
- Notch each circle by cutting a small triangle from the middle.
- Attach the diamond-shaped dough to each circle with corn syrup.
- Bake the cookies for 10-14 minutes until the edges are set.
- Cool the cookies completely on a wire rack.
- Reserve about 2 tablespoons of white modeling chocolate to color for the tassels.
- Color about ⅔ of the white modeling chocolate with flesh tone food coloring.
- Rest the colored modeling chocolate at room temperature for about 30 minutes.
- Roll out the flesh tone modeling chocolate to about 1/16th inch thickness.
- Shape the colored modeling chocolate into twelve diamond-shaped grad caps.
- Brush a light coating of corn syrup over a cookie and place the circle and diamond on top.
- Roll the modeling chocolate into a tube for the tassels.
- Extrude a single strand of chocolate into twelve 1-inch pieces for the tassels.
- Attach the strand to the center of each grad cap with a dab of corn syrup.
- Switch to a multi-hole disc on the extruder and push candy clay to create tassel strands.
- Pinch one end of the strands together and attach to the single strand at the top of the cap.
- Finalize the tassels by flattening a small piece of modeling chocolate on top.
- Optional: Add colorful sprinkles on top of the grad caps for extra festive flair.