
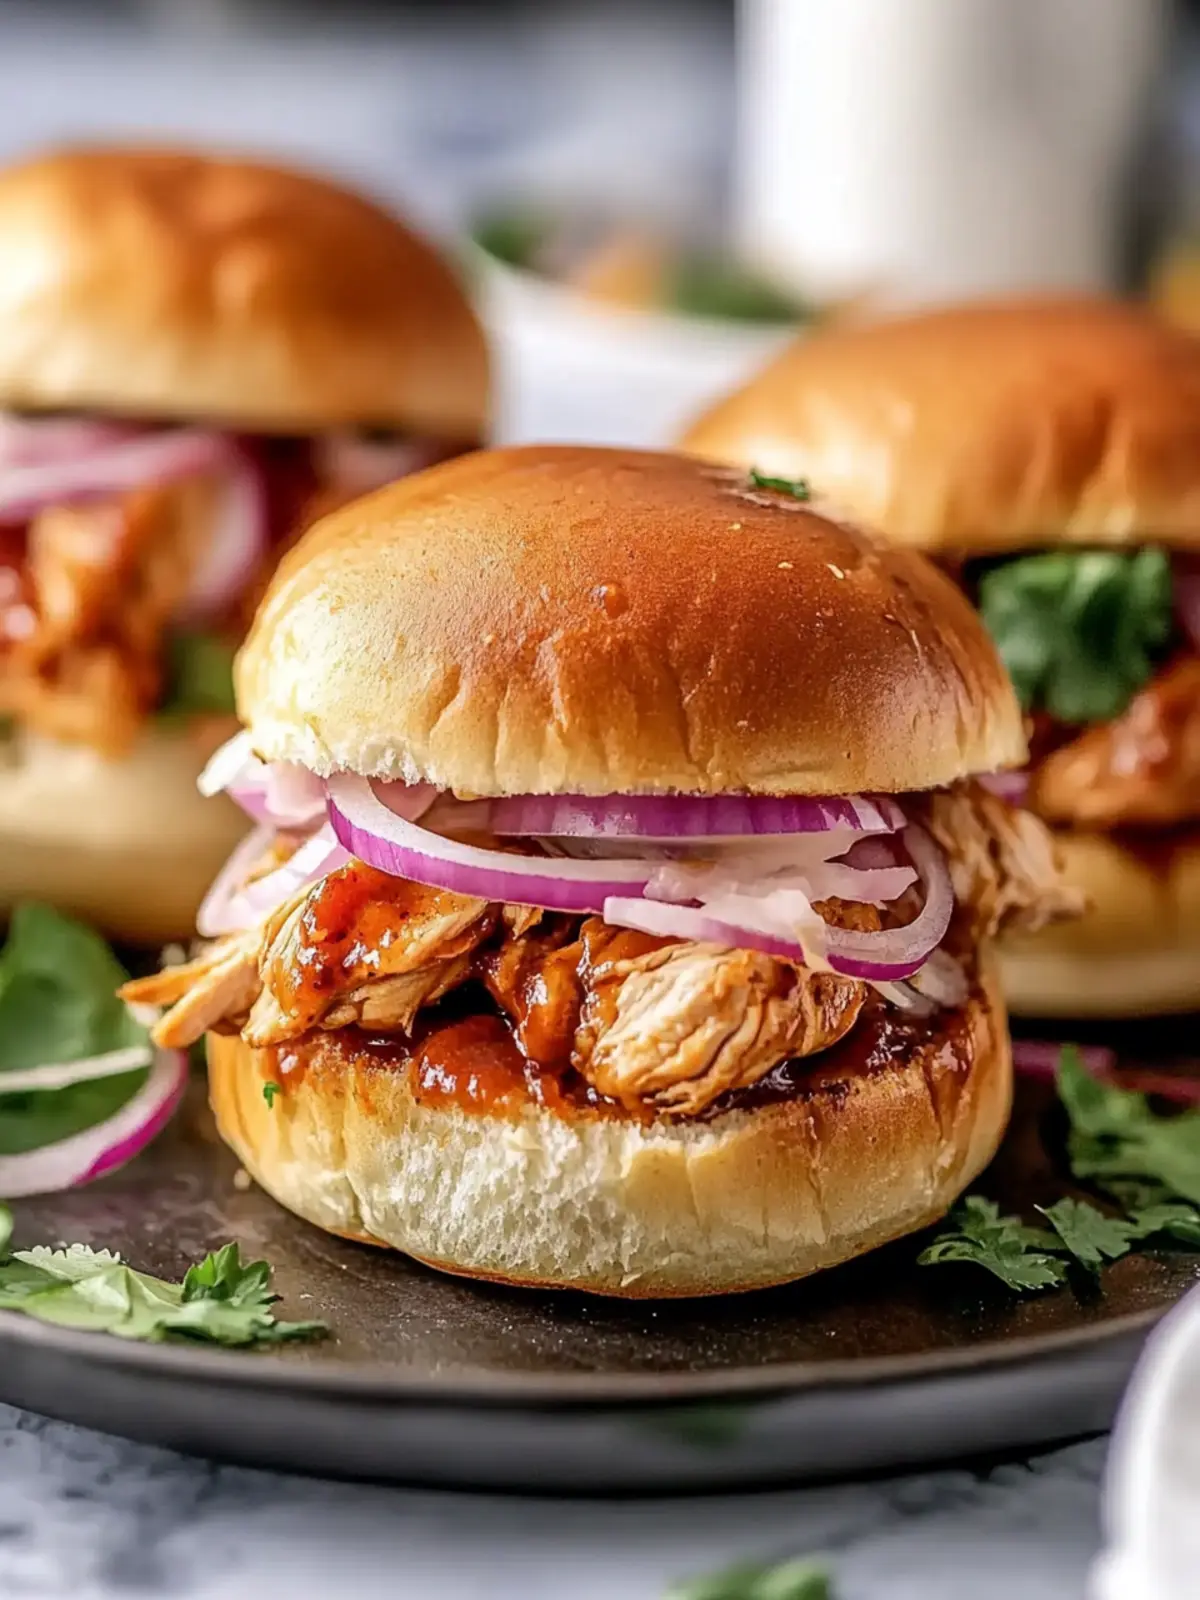
When football season rolls around, there’s nothing quite like gathering with friends and family, sharing stories, and indulging in mouthwatering food. The moment I took my first bite of these Classic BBQ Chicken Sliders, I knew they were destined to become my go-to game day treat. Picture this: tender shredded chicken smothered in zesty BBQ sauce, melty pepper Jack cheese oozing from every corner, all nestled between soft, fluffy slider rolls.
The best part? You can whip this delightful crowd-pleaser up in just 20 minutes, leaving you plenty of time to cheer for your team. Whether you prefer a spicy kick from jalapeños or a milder version for the kids, these sliders are fully customizable to suit everyone’s taste. With just a few simple ingredients, you can transform your kitchen into a flavor-packed oasis that beats any fast food option. Let’s dive into this easy, irresistible recipe that’s sure to become a favorite for every game day gathering!
Why are BBQ Chicken Sliders a must-try?
Easy to Make: The straightforward process ensures you can create these sliders without a culinary degree—perfect for novice cooks and busy parents alike.
Crowd-Pleaser: With their zesty flavors and cheesy goodness, these sliders are guaranteed to impress your guests and be the highlight of any gathering.
Customizable: Whether you like it spicy or mild, you can easily adapt the recipe with jalapeños or different cheese types to suit everyone’s palate.
Quick to Prepare: Ready in just 20 minutes, these sliders are ideal for last-minute game day snack cravings or casual weeknight dinners.
Perfect for Sharing: Their bite-sized format makes them great for passing around, allowing everyone to enjoy these delicious bites without fuss.
BBQ Chicken Sliders Ingredients
• Get ready to gather your ingredients for these mouthwatering BBQ Chicken Sliders!
For the Chicken Mixture
- Shredded Chicken – Perfect for a quick meal; use rotisserie for extra convenience.
- BBQ Sauce – Look for your favorite sauce to add that sweet and tangy flavor; homemade blends work wonders too!
- Jalapeño – Adds a spicy kick; omit for a milder flavor if preferred.
- Smoked Paprika – Gives depth and a hint of smokiness; regular paprika can be used for a gentler taste.
- Garlic Powder – Enhances the chicken’s flavor; fresh minced garlic can offer a more vibrant profile.
For the Sliders
- Slider Rolls – Opt for soft, fluffy rolls to cradle the filling; gluten-free options are available for dietary needs.
- Red Onion – Adds a delightful crunch; substitute with green onions for a milder experience.
- Cilantro – Brings a touch of freshness; parsley can stand in for a similar taste.
For the Topping
- Butter – Used for the garlic butter topping; substitute with olive oil for a dairy-free option.
- Pepper Jack Cheese – Provides creaminess with a bit of spice; swap it for cheddar or mozzarella if you prefer less heat.
- Black Pepper – Season to taste and enhance the overall flavor of your sliders.
These BBQ Chicken Sliders are bound to become a family favorite, blending convenience and flavor in every bite!
How to Make BBQ Chicken Sliders
- Preheat your oven to 350°F. Prepare a baking sheet with parchment paper or a light coating of oil to prevent sticking.
- Mix in a bowl the shredded chicken, 0.5 cup of BBQ sauce, jalapeño (if using), smoked paprika, and garlic powder until well combined.
- Split the slider rolls and arrange the bottom halves on the prepared baking sheet. Make sure they’re close together for easy assembly.
- Distribute the chicken mixture evenly over the rolls. Drizzle with the remaining BBQ sauce, then sprinkle on the red onion, cilantro, and top with pepper Jack cheese.
- Cover the sliders with the top buns and wrap the entire tray in foil. Bake for 12 minutes until the cheese is melty and the sliders are heated through.
- Prepare the garlic butter by melting the butter in a small bowl and mixing it with garlic powder until well blended.
- Brush the tops of the sliders with the garlic butter mixture, season to taste with black pepper, and bake uncovered for an additional 5-8 minutes until the tops are golden brown and crispy.
- Cool slightly before serving. Enjoy them warm, and watch them disappear!
Optional: Serve with a side of coleslaw for added crunch.
Exact quantities are listed in the recipe card below.

BBQ Chicken Sliders Variations & Substitutions
Feel free to play around with these sliders by making them your own—each tweak brings a new taste to love!
- Cheese Swap: Try gouda for a smoky flavor or go for mozzarella for a mild, creamy texture.
- Heat Level: If jalapeños are too spicy, use sweet bell peppers for a milder crunch that keeps the flavor.
- Pulled Pork: Substitute the chicken for pulled pork and pair it with mustard BBQ sauce for a Southern twist.
- Asian-Inspired: Use teriyaki sauce instead of BBQ and top with slaw for a tangy, sweet variation.
- Vegan Option: Swap the chicken for jackfruit and use vegan cheese to create a plant-based delight.
- Crunchy Toppings: Add crispy fried onions on top for a deliciously satisfying crunch that elevates each bite.
- Herbed Sliders: Mix fresh herbs like thyme or basil into the chicken mixture for a unique flavor explosion.
Each of these variations brings a new dimension to your BBQ chicken sliders, making them an exciting choice for any gathering!
Make Ahead Options
These BBQ Chicken Sliders are perfect for meal prep, allowing you to enjoy delicious, stress-free gatherings! You can prepare the chicken mixture (shredded chicken, BBQ sauce, jalapeño, smoked paprika, and garlic powder) up to 24 hours in advance; simply store it in an airtight container in the refrigerator to keep flavors fresh. The slider rolls can also be split and assembled with the chicken mixture up to 3 days ahead—just make sure to cover them tightly to prevent drying out. When you’re ready to bake, preheat the oven, cover with foil, and bake for 12 minutes, then brush with garlic butter and bake uncovered for an additional 5-8 minutes until golden brown. With these make-ahead tips, your BBQ Chicken Sliders will be just as delicious, saving you precious time on busy days!
What to Serve with BBQ Chicken Sliders?
Complement your BBQ Chicken Sliders with these delightful sides that enhance your meal and satisfy diverse cravings.
Creamy Coleslaw: It adds a crisp, refreshing contrast to the savory sliders, balancing textures beautifully. The tanginess cuts through the richness of the BBQ chicken, making each bite exciting.
Baked Beans: Sweet and smoky, these beans provide depth to your dining experience. Slow-cooked flavors will warm the heart and round out your meal with comfort food magic.
Potato Salad: Cool and creamy, this classic side dish is a crowd favorite. It’s hearty yet light, ensuring a satisfying bite alongside your sliders without overshadowing them.
Corn on the Cob: Sweet, juicy corn brings a burst of summer freshness. Grilled or boiled, it’s an easy and delicious way to add some color and sweetness to your plate.
Pickles: A crunchy, tangy bite that adds zest and acts as a palate cleanser. They contrast perfectly with the rich sliders, making every bite taste fresh.
Beer: A chilled craft beer pairs ideally with BBQ flavors, enhancing the experience with its malty notes. For non-drinkers, consider a frosty lemonade for a refreshing lift.
Whichever sides you choose, these pairings will elevate your BBQ Chicken Sliders meal into something truly unforgettable!
How to Store and Freeze BBQ Chicken Sliders
Fridge: Store leftover BBQ Chicken Sliders in an airtight container for up to 3 days. Make sure they are cooled completely before sealing to maintain freshness.
Freezer: For longer storage, individually wrap sliders in plastic wrap and place them in a freezer bag. They can be frozen for up to 2 months.
Reheating: To reheat, preheat your oven to 350°F and bake the sliders for 10-15 minutes until heated through and the cheese is melty again.
Avoid Sogginess: When storing, keep the chicken mixture separate if possible to prevent the slider buns from becoming soggy.
Tips for the Best BBQ Chicken Sliders
- Avoid Soggy Buns: Use only shredded chicken that isn’t overly wet to keep the slider buns from getting soggy during baking.
- Foil Covering: Always cover the sliders with foil during the first baking phase; this ensures the cheese melts perfectly without drying out.
- Easier Cutting: Lightly score the tops of the buns before baking; this will make cutting them easier later.
- Watch the Heat: Keep an eye on the sliders during the final bake to prevent over-baking, which can yield hard tops and less-than-ideal texture.
- Customize Wisely: If you’re adding jalapeños for heat, start with a small amount; you can always add more if you want it spicier.
BBQ Chicken Sliders Recipe FAQs
What type of chicken should I use for the BBQ Chicken Sliders?
Absolutely! You can use shredded chicken from a rotisserie for ease, or poach your own if you prefer. The key is to avoid using overly wet chicken to ensure that your sliders don’t become soggy. If you have leftover grilled chicken, that works wonderfully too!
How can I store leftover BBQ Chicken Sliders?
You can store any leftover BBQ Chicken Sliders in an airtight container in the fridge for up to 3 days. Make sure they cool completely before sealing them to help maintain their freshness. Just remember, the quicker you get them into the fridge, the better!
Can I freeze BBQ Chicken Sliders?
Yes, indeed! You can freeze BBQ Chicken Sliders by individually wrapping them in plastic wrap and placing them in a freezer bag. They can be stored in the freezer for up to 2 months. Just reheat them in the oven at 350°F for 10-15 minutes when you’re ready to indulge again!
What can I do if my BBQ Chicken Sliders turn out soggy?
If you find your sliders are soggy after baking, next time, try using less barbecue sauce in the chicken mixture or store the chicken separately from the buns before assembling them. This will help maintain their texture and keep your rolls from getting mushy.
Are BBQ Chicken Sliders a good option for kids with allergies?
Very! To cater to different dietary needs, you can easily substitute ingredients in your BBQ Chicken Sliders. For example, use gluten-free slider rolls for those with gluten sensitivities, and make sure to check your BBQ sauce for potential allergens. Always opt for dairy-free alternatives to butter if allergies are a concern.
How long does it take to prepare BBQ Chicken Sliders?
These sliders are super quick to whip up, taking just 20 minutes from start to finish! That’s perfect for last-minute guests or guaranteed to satisfy those game day cravings quickly.
Savory BBQ Chicken Sliders Ready in 20 Minutes Flat
Equipment
- - Oven
- - Baking sheet
- - Mixing bowl
- - Measuring cups
- Spatula
Ingredients
For the Chicken Mixture
- 2 cups shredded chicken use rotisserie for convenience
- 0.5 cups BBQ sauce your favorite flavor
- 1 medium jalapeño omit for milder version
- 1 teaspoon smoked paprika or regular paprika for a milder taste
- 1 teaspoon garlic powder or fresh minced garlic
For the Sliders
- 12 sliders slider rolls gluten-free options available
- 0.5 medium red onion or green onions for a milder taste
- 0.25 cups cilantro or parsley as a substitute
For the Topping
- 2 tablespoons butter or substitute with olive oil
- 1 cup pepper Jack cheese or other cheese types to preference
- to taste black pepper
Instructions
Instructions
- Preheat your oven to 350°F. Prepare a baking sheet with parchment paper or a light coating of oil to prevent sticking.
- Mix in a bowl the shredded chicken, BBQ sauce, jalapeño (if using), smoked paprika, and garlic powder until well combined.
- Split the slider rolls and arrange the bottom halves on the prepared baking sheet.
- Distribute the chicken mixture evenly over the rolls. Drizzle with the remaining BBQ sauce, then sprinkle on the red onion, cilantro, and top with pepper Jack cheese.
- Cover the sliders with the top buns and wrap the entire tray in foil. Bake for 12 minutes until the cheese is melty.
- Prepare the garlic butter by melting the butter and mixing it with garlic powder until well blended.
- Brush the tops of the sliders with the garlic butter mixture, season with black pepper, and bake uncovered for an additional 5-8 minutes.
- Cool slightly before serving. Enjoy them warm!