

As the evening chill sets in and cozy blankets beckon, there’s nothing quite like the warmth of a hearty bowl of Classic Beef Chili to lift your spirits. This recipe was born out of my quest for the ultimate comfort food, one that fills the kitchen with heavenly aromas and wraps you in a hug of flavor. Just imagine the sound of ground beef sizzling, mingling with onions and garlic, as a rich tapestry of spices dances in the air.
In less than an hour, you’ll have a bowl brimming with savory goodness, packed with protein, fiber, and satisfying warmth. Whether you’re entertaining guests or simply seeking a delightful family dinner, this chili recipe is here to rescue you from fast food fatigue. Ready to elevate your weeknight meals? Grab your apron, and let’s dive into a delicious bowl of homemade comfort!
Why will you love this chili recipe?
Simplicity: This chili recipe features an easy-to-follow process that even novice cooks can conquer in under an hour.
Hearty Goodness: Packed with protein and fiber from tender ground beef and beans, this dish provides the satisfying comfort you crave on chilly nights.
Aromatically Enticing: The savory blend of spices fills your kitchen with mouthwatering scents that will have everyone eagerly awaiting dinner.
Versatile: Customize it to your liking by swapping ground beef for turkey or adding extra veggies for a nutritional boost.
Crowd-Pleasing Appeal: This dish is perfect for gatherings, serving family-style with toppings that let everyone personalize their bowl.
Transform your meals with this Ultimate Chili Recipe and turn your dining experience into a comforting and delicious affair!
Classic Beef Chili Ingredients
For the Base
- Olive Oil – Used for sautéing the onions and garlic; can substitute with canola or vegetable oil.
- Yellow Onion – Adds flavor and sweetness; use a sweet onion for a milder taste.
- Garlic Cloves – Provides robust flavor; garlic powder works in a pinch if fresh is unavailable.
- Tomato Paste – Deepens the tomato flavor; can swap with crushed tomatoes if needed.
For the Chili
- Ground Beef (80-85% lean) – The main protein that gives heartiness to your chili; ground turkey or chicken are great lean alternatives.
- Kosher Salt – Enhances overall flavor; adjust to fit your dietary preferences.
- Black Pepper – Adds seasoning; for a subtler heat, you can replace it with white pepper.
- Chili Powder – The primary spice that adds mild heat; consider cayenne or a spice blend for extra flavor.
- Ground Cumin – Introduces depth and warmth; for a unique twist, try garam masala.
- Unsweetened Cocoa Powder – Balances acidity and enriches the chili’s richness; omit if you prefer a sweeter dish.
- Dried Oregano – Adds herbal notes; substitute with Italian seasoning if needed.
- Paprika – Contributes smokiness; smoked paprika can amp up the flavor.
- Cayenne Pepper (optional) – Adjusts heat level; omit for a milder taste.
- Kidney Beans (2 cans) – Offers texture and fiber; replace with black or pinto beans if preferred.
- Fire-Roasted Crushed Tomatoes – Provides smokiness and depth; regular crushed tomatoes can also be used.
- Beef/Chicken Broth (1 can, low-sodium) – Acts as the liquid base; swap with vegetable broth for a vegetarian option.
- Apple Cider Vinegar – Brightens and balances flavors; lemon juice can be a substitute.
For Serving
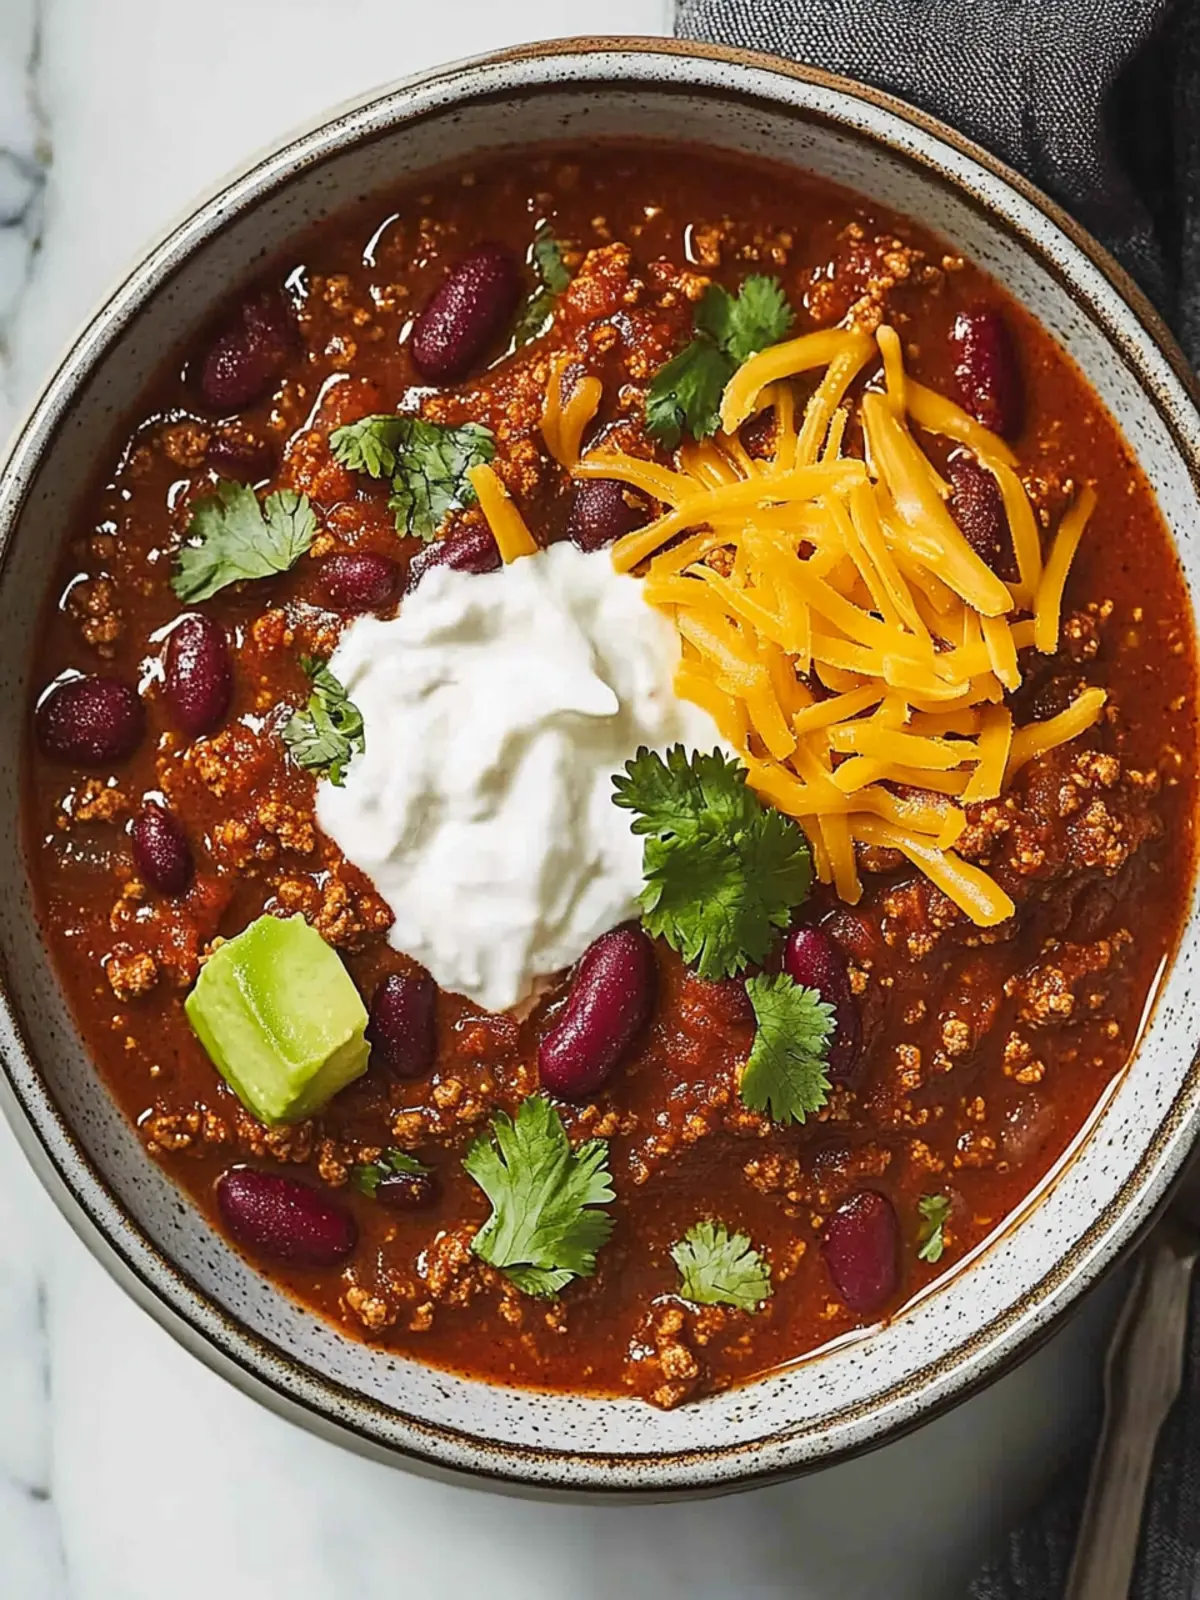
- Toppings – Choose from sour cream, shredded cheddar, scallions, avocado, fresh cilantro, and tortilla chips to enhance your chili experience!
Dive into this delicious chili recipe and savor the comforting warmth it brings to your table. Enjoy!
How to Make Classic Beef Chili
Heat Oil: Start by warming olive oil in a Dutch oven over medium heat until it shimmers, creating a perfect base for your aromatic chili.
Sauté Onions: Add diced yellow onion to the pot. Sauté until it’s softened, about 3-5 minutes, then stir in minced garlic, cooking for an additional minute until fragrant.
Incorporate Tomato Paste: Mix in the tomato paste, stirring occasionally for 2-3 minutes until it darkens, intensifying the flavors in your chili.
Add Ground Beef: Introduce the ground beef along with kosher salt and black pepper. Cook this mixture for 6-8 minutes until the beef is nicely browned, showcasing that hearty texture.
Spice It Up: Stir in chili powder, cumin, cocoa powder, oregano, paprika, and optional cayenne. Cook for another minute to let those spices bloom and fill your kitchen with their irresistible aroma.
Combine Ingredients: Add the drained kidney beans, fire-roasted crushed tomatoes, and broth. Bring everything to a boil, letting the flavors meld beautifully.
Simmer the Chili: Reduce the heat to a gentle simmer for 30-40 minutes, allowing the chili to thicken slightly and deepen in flavor.
Finish with Vinegar: After simmering, turn off the heat and stir in apple cider vinegar; taste and adjust seasoning as needed before serving.
Optional: Garnish with sour cream, shredded cheddar, and fresh cilantro for an extra burst of flavor.
Exact quantities are listed in the recipe card below.

Make Ahead Options
These Classic Beef Chili options are ideal for meal prep enthusiasts! To save time on busy weeknights, you can sauté the onions and garlic and cook the ground beef up to 24 hours in advance, then refrigerate them until you’re ready to assemble the chili. Alternatively, you can fully prepare the chili and store it in an airtight container for up to 3 days in the refrigerator. Just remember to let it cool before refrigerating to maintain its quality. When you’re ready to enjoy, simply reheat the chili on the stovetop or in the microwave until thoroughly warmed. This way, you’ll have a comforting, homemade meal awaiting you with minimal effort!
What to Serve with Classic Beef Chili?
As the rich aroma of your Classic Beef Chili fills the air, it’s time to think about delightful accompaniments that elevate this comforting dish even further.
- Cornbread: The slightly sweet, buttery flavor of cornbread perfectly contrasts the spicy chili, creating a delightful balance in every bite.
- Baked Potatoes: Fluffy and warm, these potatoes are ideal for scooping up or topping with chili, adding a robust texture to your meal.
- Tortilla Chips: Crispy and salty, these chips add a satisfying crunch. Serve them alongside for dipping or crumbling on top of your chili.
- Fresh Cilantro Salad: A vibrant blend of greens and cilantro brightens the meal while providing a refreshing bite against the hearty chili.
- Avocado Toast: The creamy richness of avocado enhances the chili’s flavors, offering a modern twist that collagenates beautifully with your bowl.
- Sour Cream: A dollop of sour cream adds a cool, creamy element, mellowing the heat and creating a comforting texture alongside the chili.
- Beer or Red Wine: A chilled lager or a glass of hearty red wine complements the chili’s robustness, enhancing the entire dining experience.
- Chocolate Brownies: For dessert, indulge in fudgy brownies that wrap up your meal with a touch of sweetness, perfectly contrasting the savory chili.
- Coleslaw: The crunch and tang of a fresh coleslaw can brighten the plate, cutting through the chili’s richness with its increasing acidity and flavor.
Pairing these delightful sides and drinks with your Classic Beef Chili will create a meal that is not only hearty but also a feast for all the senses!
Expert Tips for Classic Beef Chili
Flavor Enhancement: Let chili sit overnight in the fridge for better flavor development. The spices will meld beautifully for a richer taste.
Proper Browning: Avoid overcrowding the pot when browning the ground beef; this ensures a good sear and deeper flavor in your chili recipe.
Herb Measurement: If using dried herbs instead of fresh, remember they are more potent. Use about one-third of the amount recommended for fresh herbs.
Taste Before Serving: Always taste and adjust seasonings towards the end of cooking. This ensures your chili is perfectly seasoned to your personal liking.
Customize Your Heat: If you prefer a milder chili recipe, omit the cayenne pepper or adjust the chili powder to your taste preference.
How to Store and Freeze Chili Recipe
Fridge: Store leftover chili in an airtight container for up to 4 days. Make sure it’s fully cooled before sealing to maintain freshness.
Freezer: For longer storage, freeze the chili for up to 3 months. Use freezer-safe containers or heavy-duty freezer bags, removing excess air for optimal preservation.
Reheating: Thaw overnight in the refrigerator before reheating. Warm thoroughly on the stovetop or in the microwave until piping hot, ensuring every spoonful of your chili recipe is deliciously satisfying.
Leftover Ideas: Mix in pasta, rice, or use as a filling for tacos or baked potatoes to create new meals from your hearty chili!
Chili Recipe Variations
Feel free to get creative and adapt this chili recipe to suit your taste buds!
- Ground Turkey: Swap the ground beef for ground turkey for a leaner, lighter option packed with flavor.
- Vegetarian Delight: Use lentils or a mix of beans, along with mushrooms, to create a hearty plant-based chili.
- Sweet & Spicy: Add a tablespoon of honey or brown sugar to balance the heat with a touch of sweetness.
- Extra Veggies: Toss in bell peppers, zucchini, or carrots for added texture and nutritional benefits; it’ll be colorful and wholesome!
- Smoky Chipotle: Stir in diced chipotle peppers in adobo sauce for a spicy, smoky twist that elevates the flavor profile.
- Spicy Kick: Increase heat by adding fresh jalapeños or more cayenne pepper according to your spice tolerance.
- Creamy Twist: For a velvety consistency, stir in cream cheese or sour cream just before serving, making each bite rich and smooth.
- Herb Infusion: Experiment with fresh herbs like cilantro or cilantro for a fresh, aromatic lift to your chili.
Step into the kitchen and let your culinary instincts guide you to create a personalized version of this comforting chili recipe!

Classic Beef Chili Recipe FAQs
What kind of ground beef should I use for my chili recipe?
Absolutely! For the best flavor and texture in your chili recipe, choose ground beef that is 80-85% lean. This balance provides enough fat for richness while keeping the dish from being greasy. If you prefer a leaner option, ground turkey or chicken also works very well!
How do I store leftover chili?
Very easy! Store your leftover chili in an airtight container in the refrigerator for up to 4 days. Ensure it has cooled completely before sealing to keep it fresh and safe. When you’re ready to enjoy it again, just pop it in the microwave or heat it on the stovetop until it’s piping hot.
Can I freeze chili leftovers?
Certainly! Freezing is a fantastic way to preserve your chili. Transfer cooled chili to freezer-safe containers or heavy-duty freezer bags, making sure to remove as much air as possible to avoid freezer burn. It will maintain its best quality for up to 3 months. When you’re ready to eat it, thaw it overnight in the refrigerator and reheat thoroughly before serving.
What can I do if my chili is too thick?
If your chili turns out thicker than you’d like, no worries! Simply add a small amount of broth or water, stirring it in gradually until you reach your desired consistency. This also enhances the flavors, so taste along the way to ensure you get it just right.
Can I use different beans in my chili?
Absolutely! While kidney beans are a classic choice, feel free to switch them out for black beans, pinto beans, or even chickpeas if you’re feeling adventurous. Each variety brings a unique flavor and texture to the dish, making your chili recipe even more exciting!
Is this chili recipe suitable for those with allergies?
Great question! This chili can be adjusted to accommodate various dietary needs. If you have gluten sensitivities, ensure your broth and any optional toppings are gluten-free. You can also replace the ground beef for plant-based options, like textured vegetable protein or lentils, making it vegan-friendly as well! Always be sure to double-check labels if you are cooking for someone with specific allergies.

Ultimate Chili Recipe: Comforting Flavor for Cozy Nights
Equipment
- - Dutch oven
Ingredients
For the Base
- 2 tablespoons Olive Oil can substitute with canola or vegetable oil
- 1 large Yellow Onion use a sweet onion for a milder taste
- 3-4 cloves Garlic Cloves garlic powder works in a pinch
- 2 tablespoons Tomato Paste can swap with crushed tomatoes if needed
For the Chili
- 1 pound Ground Beef (80-85% lean) great lean alternatives include ground turkey or chicken
- 1 teaspoon Kosher Salt adjust to fit your dietary preferences
- 1 teaspoon Black Pepper can replace with white pepper for a subtler heat
- 2 tablespoons Chili Powder consider cayenne or a spice blend for extra flavor
- 1 teaspoon Ground Cumin try garam masala for a unique twist
- 1 tablespoon Unsweetened Cocoa Powder omit if you prefer a sweeter dish
- 1 teaspoon Dried Oregano substitute with Italian seasoning if needed
- 1 teaspoon Paprika smoked paprika can amp up the flavor
- 1/4 teaspoon Cayenne Pepper omit for a milder taste
- 2 cans Kidney Beans replace with black or pinto beans if preferred
- 28 ounces Fire-Roasted Crushed Tomatoes regular crushed tomatoes can also be used
- 1 can Beef/Chicken Broth swap with vegetable broth for a vegetarian option
- 1 tablespoon Apple Cider Vinegar lemon juice can be a substitute
For Serving
- Toppings choose from sour cream, shredded cheddar, scallions, avocado, fresh cilantro, and tortilla chips
Instructions
Directions
- Start by warming olive oil in a Dutch oven over medium heat until it shimmers.
- Add diced yellow onion to the pot. Sauté until softened, about 3-5 minutes, then stir in minced garlic and cook for an additional minute.
- Mix in the tomato paste, stirring occasionally for 2-3 minutes until it darkens.
- Introduce the ground beef along with kosher salt and black pepper. Cook for 6-8 minutes until nicely browned.
- Stir in chili powder, cumin, cocoa powder, oregano, paprika, and optional cayenne. Cook for another minute.
- Add the drained kidney beans, fire-roasted crushed tomatoes, and broth. Bring to a boil.
- Reduce heat to a gentle simmer for 30-40 minutes, allowing the chili to thicken.
- After simmering, turn off heat and stir in apple cider vinegar; taste and adjust seasoning as needed.