
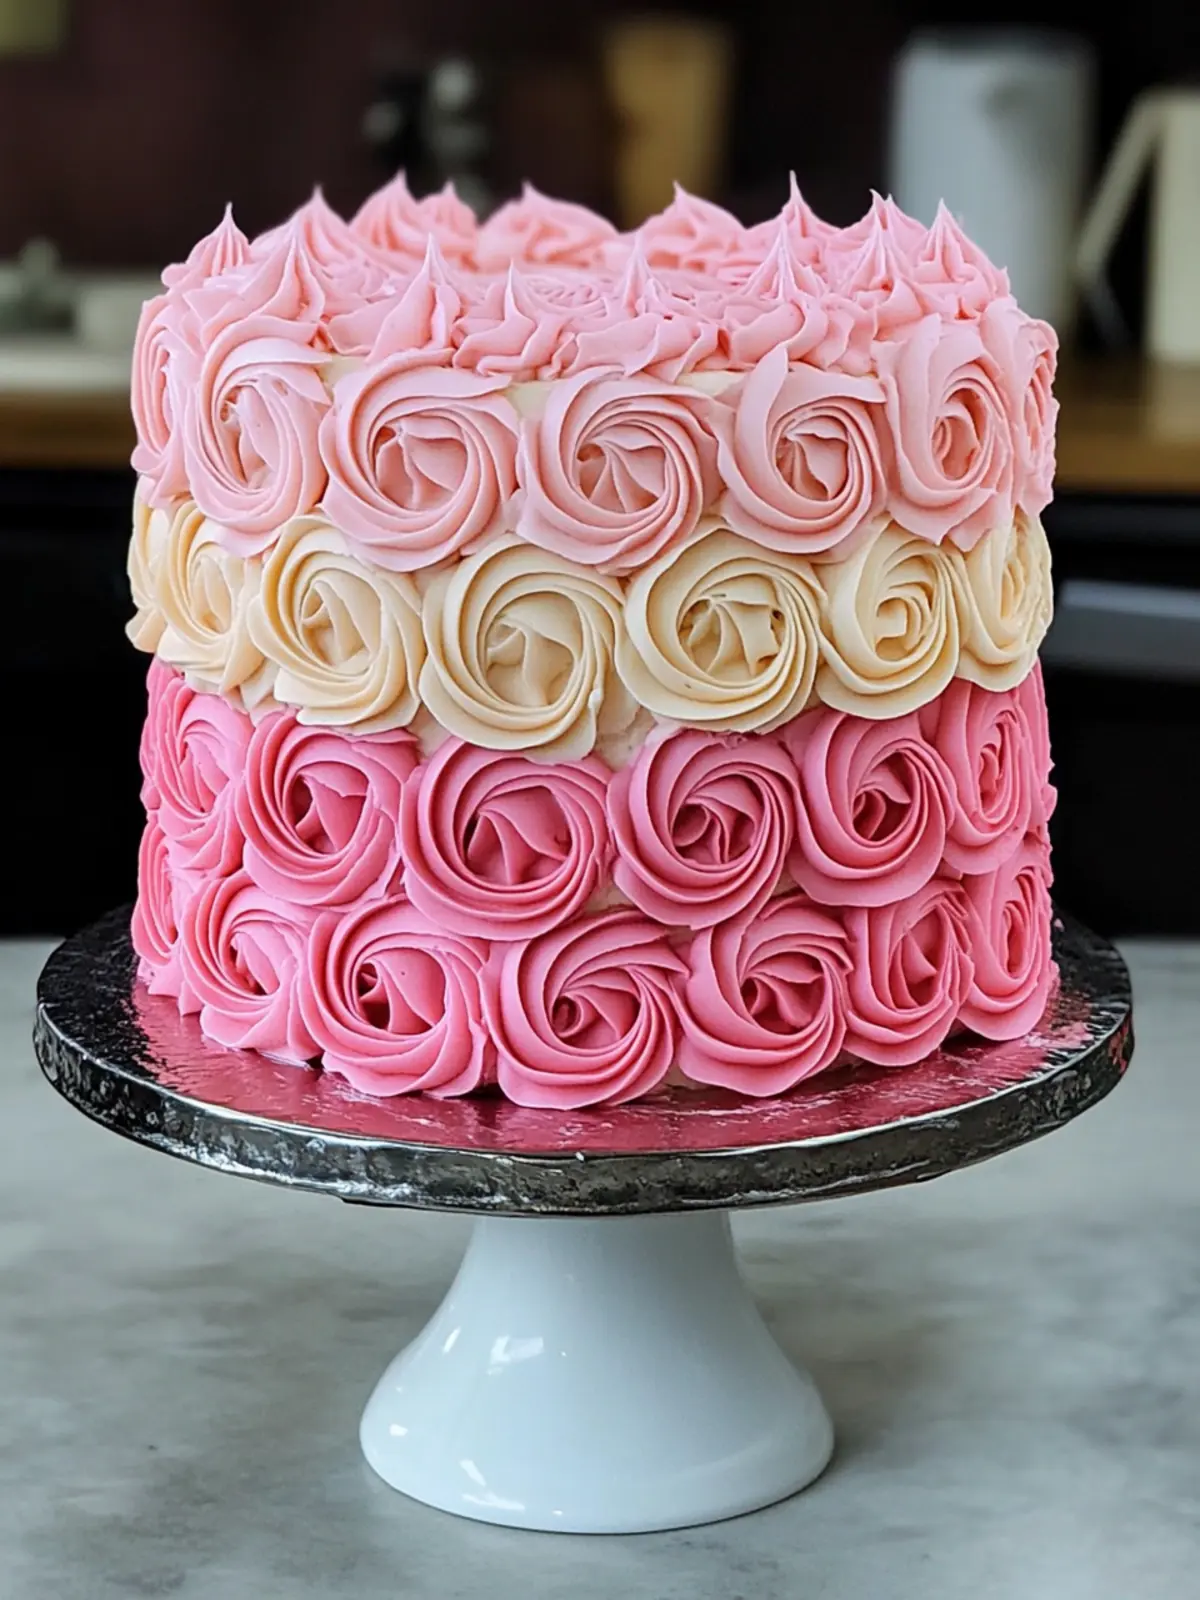
As I stood in my kitchen, surrounded by an array of colorful sprinkles and rich chocolate flavors, I felt inspired to create something truly special. The idea of an Ombre Pink Rose Cake danced in my mind like a vivid watercolor painting, begging to be brought to life. Each layer, light and fluffy, paired with creamy buttercream, becomes a canvas for a beautiful gradient of pink that’s just as delightful to eat as it is to behold.
This cake isn’t just about looks; it’s a celebration of taste too. Imagine cutting into each slice to reveal velvety chocolate and a surprise filling of tart raspberry jam paired perfectly with fresh berries. While it may seem like a challenging endeavor, rest assured—every step has been detailed so you can achieve this stunning creation with ease. Perfect for birthdays, anniversaries, or just because, your friends and family will be wowed by both the elegance and the flavors of this cake. Ready to elevate your baking game? Let’s dive into the recipe!

Why is this Ombre Pink Rose Cake so special?
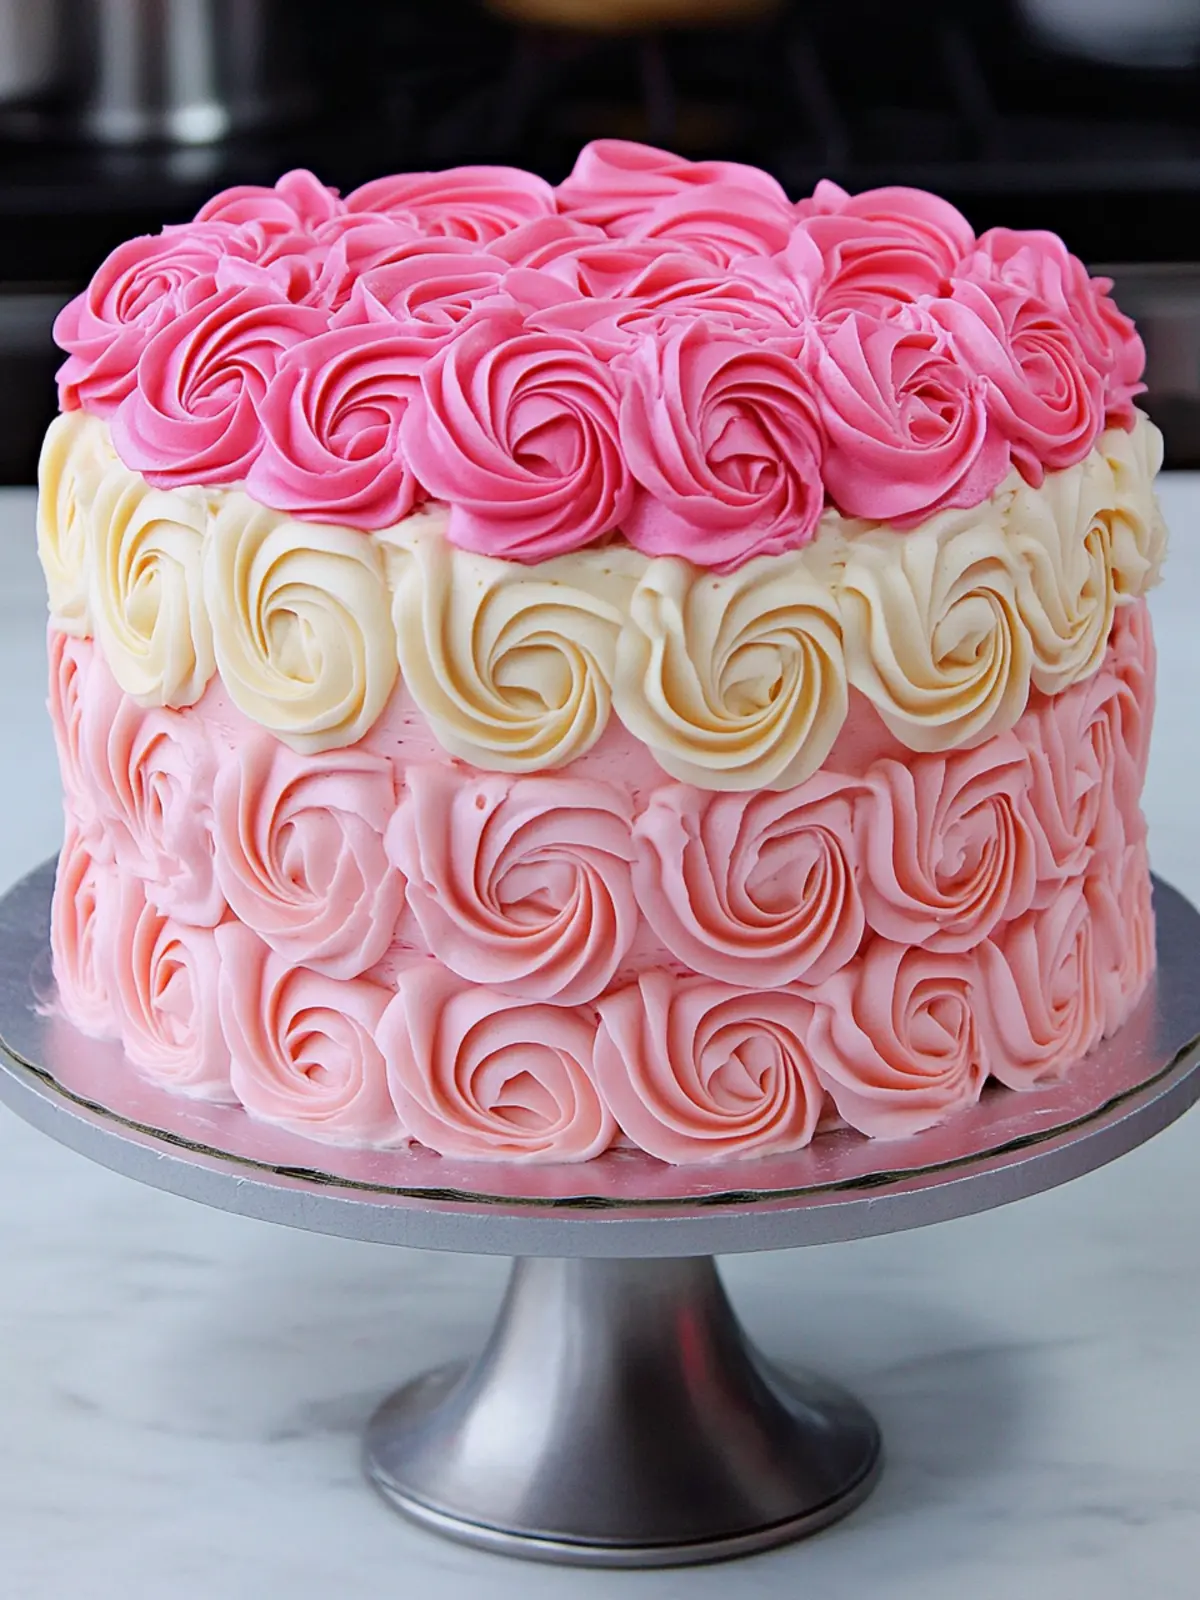
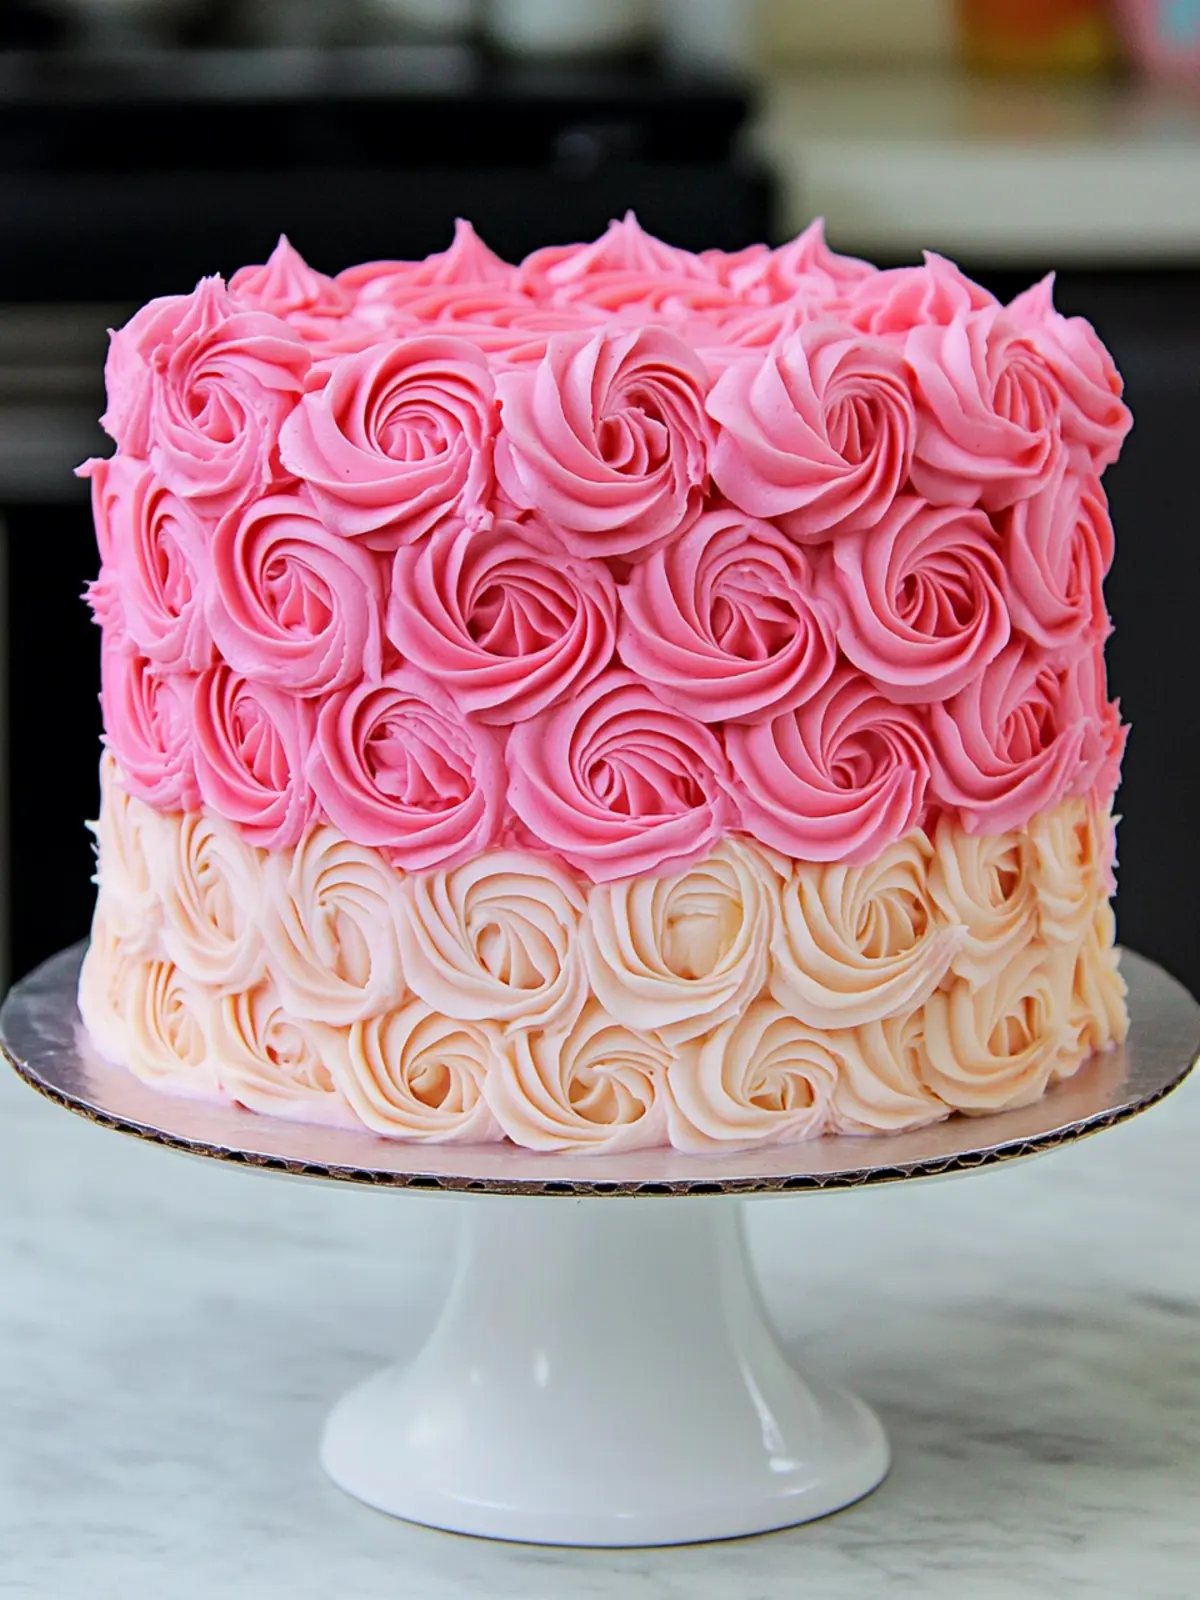
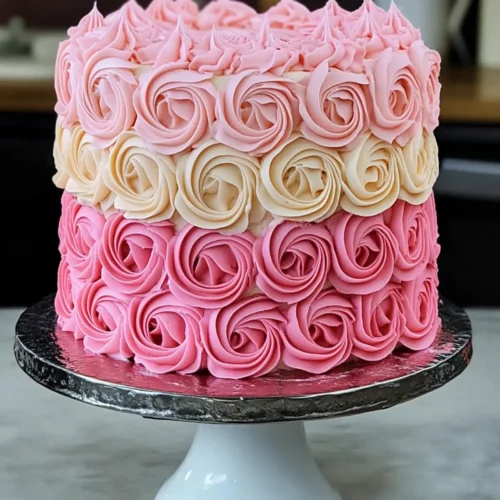
Visual Delight: The striking gradient of pink rosettes makes this cake a true showstopper, perfect for any celebration.
Flavor Fusion: Enjoy the rich chocolate layers paired with tart raspberry jam, creating a harmonious balance of flavors in every bite.
Easy Steps: You don’t need to be a professional baker—this recipe breaks down the process into simple, manageable steps.
Versatile Options: Customize with different flavors for the cake or frosting to adapt to any palate. For a burst of freshness, consider serving with whipped cream or ice cream for that extra touch of indulgence!
Make-Ahead Magic: Bake the layers in advance and freeze them, making it a breeze to prepare for special occasions without the last-minute stress.
Ombre Pink Rose Cake Ingredients
• A delightful range of ingredients comes together to create this stunning cake—let’s look at what you’ll need!
For the Cake Layers
- All-Purpose Flour – Provides the necessary structure; you can substitute with gluten-free flour if needed.
- Granulated Sugar – Sweetens the cake and helps keep it moist; no direct substitute suggested.
- Cocoa Powder – Adds a rich chocolate flavor; can be replaced with carob powder for a non-chocolate option.
- Baking Powder & Baking Soda – Essential leavening agents; ensure they are fresh for best results.
- Fine Salt – Enhances flavor and balances sweetness; regular salt can stand in if necessary.
- Instant Espresso Powder – Boosts the chocolate taste without imparting a coffee flavor; feel free to omit if caffeine-sensitive.
- Buttermilk – Adds tenderness; substitute with 1 cup of milk mixed with 1 tsp of vinegar if unavailable.
- Vegetable Oil – Keeps the cake moist; melted coconut oil or unsweetened applesauce work for lower fat.
- Vanilla Extract – Provides depth of flavor; consider using vanilla bean paste for a richer taste.
- Vinegar – Aids structure and tenderness; lemon juice is a suitable alternative.
- Large Eggs – Help bind the ingredients and assist in rising; use flax eggs for an egg-free version (1 tbsp flaxseed meal + 3 tbsp water per egg).
For the Buttercream Frosting
- Unsalted Butter – The base of your frosting; make sure it’s at room temperature for easy mixing.
- Raspberry Powder (optional) – Adds delightful fruit flavor and color to the frosting; can be skipped or swapped for another fruit powder.
- Powdered Sugar – Sweetens and thickens the frosting; no direct substitute recommended.
- Heavy Cream – Provides a silky texture to the buttercream; milk can be used, though the thickness will differ.
- Pink Food Coloring – Necessary for the ombre effect; gel food coloring is recommended for vibrant aesthetics.
For the Optional Filling and Topping
- Raspberry Jam (optional) – A sweet complement to chocolate; any fruit jam can be used instead.
- Fresh Raspberries (optional) – Adds freshness and vibrant color; other berries can be substituted based on preference.
With these Ombre Pink Rose Cake ingredients ready to go, you’re all set to create a cake that dazzles both the eyes and the palate!
How to Make Ombre Pink Rose Cake
Preheat your oven to 350°F (175°C) and prepare your cake pans. Line them with parchment paper and grease the sides to ensure easy removal after baking.
Mix dry ingredients: In a large bowl, whisk together the all-purpose flour, granulated sugar, cocoa powder, baking powder, baking soda, and fine salt until well combined. This will create a smooth base for your cake layers.
Combine wet ingredients: In a separate bowl, dissolve the instant espresso powder in hot water, then add buttermilk, vegetable oil, vanilla extract, and vinegar. Mix these until smooth and combined, filling your kitchen with delightful aromas.
Combine the wet and dry mixtures: Pour the wet ingredients into the bowl with the dry ingredients and stir until just combined. Then, one at a time, gently add large eggs and mix until you have a smooth batter, ready to rise beautifully in the oven.
Bake the cake layers: Divide the batter evenly between your prepared pans and bake for 24-27 minutes, or until a toothpick inserted into the center comes out clean. Once done, allow the layers to cool before placing them in the freezer for easier handling later.
Prepare frosting: In a mixing bowl, beat softened unsalted butter until creamy. Gradually add powdered sugar, a pinch of salt, heavy cream, and vanilla extract. Mix until smooth and fluffy, then separate the frosting into four bowls to color them in shades of pink using gel food coloring.
Assemble your cake: Begin frosting each layer with the corresponding shade of pink buttercream, and don’t forget to add a layer of raspberry jam and fresh raspberries if you’ve chosen to include filling.
Crumb coat the cake: Apply a thin layer of frosting over the entire cake to seal in the crumbs. Chill for about 30 minutes to let it set, creating a smooth base for your rosettes.
Pipe rosettes: Using an open star piping tip, start from the base and work your way up to create rosettes, following a light-to-dark color pattern for that stunning ombre effect. Take your time, and let every rosette shine!
Chill again: Allow your beautifully decorated Ombre Pink Rose Cake to set in the refrigerator for a final time before slicing and serving, ensuring every layer is perfectly cut and enjoyed.
Optional: Dust with edible glitter for a sparkling finish!
Exact quantities are listed in the recipe card below.
Make Ahead Options
This Gorgeous Ombre Pink Rose Cake is perfect for busy home cooks looking to save time without compromising on presence or taste! You can prepare the cake layers up to 24 hours in advance by baking them, allowing them to cool, and then wrapping them tightly in plastic wrap before refrigerating. The buttercream frosting can also be made and refrigerated for up to 3 days; just re-whip it before use to restore its fluffy texture. For a delightful surprise, you can add the raspberry jam filling right before serving, ensuring it remains fresh and vibrant. With these simple make-ahead steps, you’ll delight family and friends with beautiful results and reduce stress in your kitchen!
What to Serve with Ombre Rosette Cake?
Imagine a dessert table that’s as enchanting as your stunning cake, combining sweet, savory, and refreshing elements.
- A Scoop of Vanilla Ice Cream: Creamy and cool, it perfectly contrasts the rich chocolate layers, enhancing every luscious bite.
- Whipped Cream with Berries: Light and airy, a dollop of whipped cream topped with mixed berries adds freshness and a delightful tartness to balance sweetness.
- Chocolate Ganache Drizzle: This silky finish enriches your cake even further, creating a decadent experience that’s true to chocolate lovers’ dreams.
- Fruit Salad: A vibrant medley of seasonal fruits adds a refreshing crunch that cuts through the cake’s richness, brightening the dessert spread.
- Espresso or Coffee: Pair with a cup of rich coffee or espresso to elevate those chocolate flavors and add a warmth perfect for gatherings.
- Sparkling Water with Citrus: Refreshing and bubbly, this drink cleanses the palate, allowing the delightful notes of the cake to shine even brighter.
Create a delightful experience that highlights the artistry of your Ombre Rosette Cake, making every moment memorable!
Expert Tips for Ombre Pink Rose Cake
- Chill Layers: Always chill the cake layers before stacking to help prevent breaking; this makes handling them much easier.
- Practice Piping: Test your piping on parchment paper before decorating the actual cake to achieve perfect rosettes for your Ombre Pink Rose Cake.
- Color Balance: Ensure you have enough of the lightest frosting color to effectively cover the top layer and avoid seeing the cake through.
- Finish Neatly: When piping each rosette, aim to finish the swirl at the point where the next rosette will begin to seamless hide the tails.
- Set Properly: Allow your finished cake to chill after decorating to set the buttercream, making slicing easier and maintaining the design.
How to Store and Freeze Ombre Pink Rose Cake
Fridge: Store leftover cake in an airtight container in the refrigerator for up to 3 days to keep it fresh and moist.
Freezer: If you want to save the Ombre Pink Rose Cake, it can be frozen for up to 1 month. Wrap tightly in plastic wrap and then in aluminum foil for best results.
Frosting Storage: Any remaining buttercream frosting can be kept in the fridge for up to 1 month or in the freezer for up to 3 months. Just re-whip before use!
Reheating: To enjoy your cake cold, just slice and serve! If you prefer it slightly warm, pop individual slices in the microwave for about 10-15 seconds.
Ombre Pink Rose Cake Variations
Get ready to unleash your creativity in the kitchen with these fun variations that elevate the traditional recipe!
Vanilla Layers: Swap the chocolate cake for vanilla or lemon-flavored layers for a refreshing twist. This will brighten the flavors and still offer a stunning rosette design.
Fruit Flavored Frosting: Instead of pink vanilla buttercream, consider using fruit-flavored frostings like strawberry, blueberry, or coconut. Each will add a unique taste complementing the cake beautifully.
Nutty Crunch: Add chopped nuts or toasted coconut to the batter for a delightful texture that contrasts the fluffy cake. Just be sure to choose nuts that align with your guests’ preferences.
Gluten-Free: Substitute the all-purpose flour with your favorite gluten-free blend for a delightful gluten-free version. This way, everyone can enjoy a slice!
Dairy-Free: Replace the buttermilk with plant-based milk combined with vinegar and the butter with coconut cream for a delicious dairy-free option that doesn’t compromise taste.
Color Combination: Get creative with your frosting colors! Try contrasting hues like purples and yellows or using a deep blue for a vibrant, eye-catching design.
Spiced Cake: Incorporate warm spices like cinnamon or nutmeg into your chocolate batter for a cozy flavor boost that adds warmth to special gatherings.
Citrus Zest Finish: Add a touch of orange or lemon zest into your buttercream for a bright, zesty finish that will awaken your taste buds. This pairing will balance the sweetness beautifully!
Ombre Pink Rose Cake Recipe FAQs
What type of flour should I use for the Ombre Pink Rose Cake?
I recommend using all-purpose flour for the best structure. However, if you need a gluten-free option, you can substitute it with a gluten-free flour blend. Just be sure it’s a 1:1 substitute for optimal results!
How should I store the Ombre Pink Rose Cake after baking?
For maximum freshness, store any leftover cake in an airtight container in the refrigerator for up to 3 days. If you have a whole cake, you can cover it loosely with plastic wrap to avoid any moisture loss while still allowing it to breathe. It’s essential to keep it sealed so it stays moist!
Can I freeze the Ombre Pink Rose Cake?
Absolutely! You can freeze the cake layers for up to 1 month. Wrap each layer tightly in plastic wrap, followed by aluminum foil to prevent freezer burn. When you’re ready to enjoy it, thaw it in the fridge overnight before frosting or serving.
What should I do if my cake layers are uneven?
If your cake layers come out uneven or domed, don’t worry! Just use a serrated knife to trim the tops of each layer so they’re flat before stacking them. This will ensure that your Ombre Pink Rose Cake sits evenly and looks beautiful when frosted.
Can I make the frosting ahead of time?
Yes! You can prepare the buttercream frosting in advance and store it in the refrigerator for up to 1 month. When you’re ready to use it, simply re-whip the frosting to restore its creamy texture. If you freeze it, it can last for up to 3 months—just thaw it in the fridge before re-whipping.
Is this recipe suitable for those with egg allergies?
If you’re looking to make the Ombre Pink Rose Cake egg-free, you can substitute the large eggs with flax eggs. To make one flax egg, mix 1 tablespoon of flaxseed meal with 3 tablespoons of water and let it sit for about 5 minutes until it thickens. Use this mixture for each egg required in the recipe!
Gorgeous Ombre Pink Rose Cake That's Surprisingly Easy to Make
Equipment
- - Oven
- - Mixing bowls
- Cake Pans
- Piping bag
- Whisk
- Spatula
Ingredients
For the Cake Layers
- 2 cups All-Purpose Flour substitute with gluten-free flour if needed
- 2 cups Granulated Sugar no direct substitute suggested
- 3/4 cup Cocoa Powder can be replaced with carob powder
- 1 tbsp Baking Powder ensure it's fresh for best results
- 1 tsp Baking Soda ensure it's fresh for best results
- 1/2 tsp Fine Salt regular salt can substitute if necessary
- 1 tbsp Instant Espresso Powder omit if caffeine sensitive
- 1 cup Buttermilk substitute with milk + vinegar if unavailable
- 1/2 cup Vegetable Oil use coconut oil or applesauce for lower fat
- 2 tsp Vanilla Extract consider using vanilla bean paste for richer taste
- 1 tbsp Vinegar lemon juice is a suitable alternative
- 4 Large Eggs use flax eggs for egg-free version
For the Buttercream Frosting
- 1 cup Unsalted Butter at room temperature
- 1/4 cup Raspberry Powder optional, can be skipped
- 4 cups Powdered Sugar no direct substitute recommended
- 1/4 cup Heavy Cream milk can be used but thickness will differ
- 1 tbsp Pink Food Coloring gel food coloring recommended
For the Optional Filling and Topping
- 1/2 cup Raspberry Jam any fruit jam can be used
- 1 cup Fresh Raspberries other berries can be substituted
Instructions
Directions
- Preheat your oven to 350°F (175°C) and prepare your cake pans. Line them with parchment paper and grease the sides.
- In a large bowl, whisk together the all-purpose flour, granulated sugar, cocoa powder, baking powder, baking soda, and fine salt until well combined.
- In a separate bowl, dissolve the instant espresso powder in hot water, then add buttermilk, vegetable oil, vanilla extract, and vinegar. Mix until smooth.
- Pour the wet ingredients into the bowl with the dry ingredients and stir until just combined. Then, gently add large eggs one at a time, mixing until smooth.
- Divide the batter evenly between pans and bake for 24-27 minutes. Allow the layers to cool before freezing.
- In a mixing bowl, beat softened unsalted butter until creamy. Gradually add powdered sugar, salt, heavy cream, and vanilla extract until smooth and fluffy.
- Separate the frosting into four bowls and color them in shades of pink using gel food coloring.
- Frost each layer with the corresponding shade of pink buttercream, and add raspberry jam and fresh raspberries if desired.
- Apply a thin crumb coat over the entire cake and chill for about 30 minutes.
- Pipe rosettes from base to top using an open star piping tip, following a light-to-dark pattern.
- Allow your decorated cake to chill in the refrigerator before slicing and serving.