
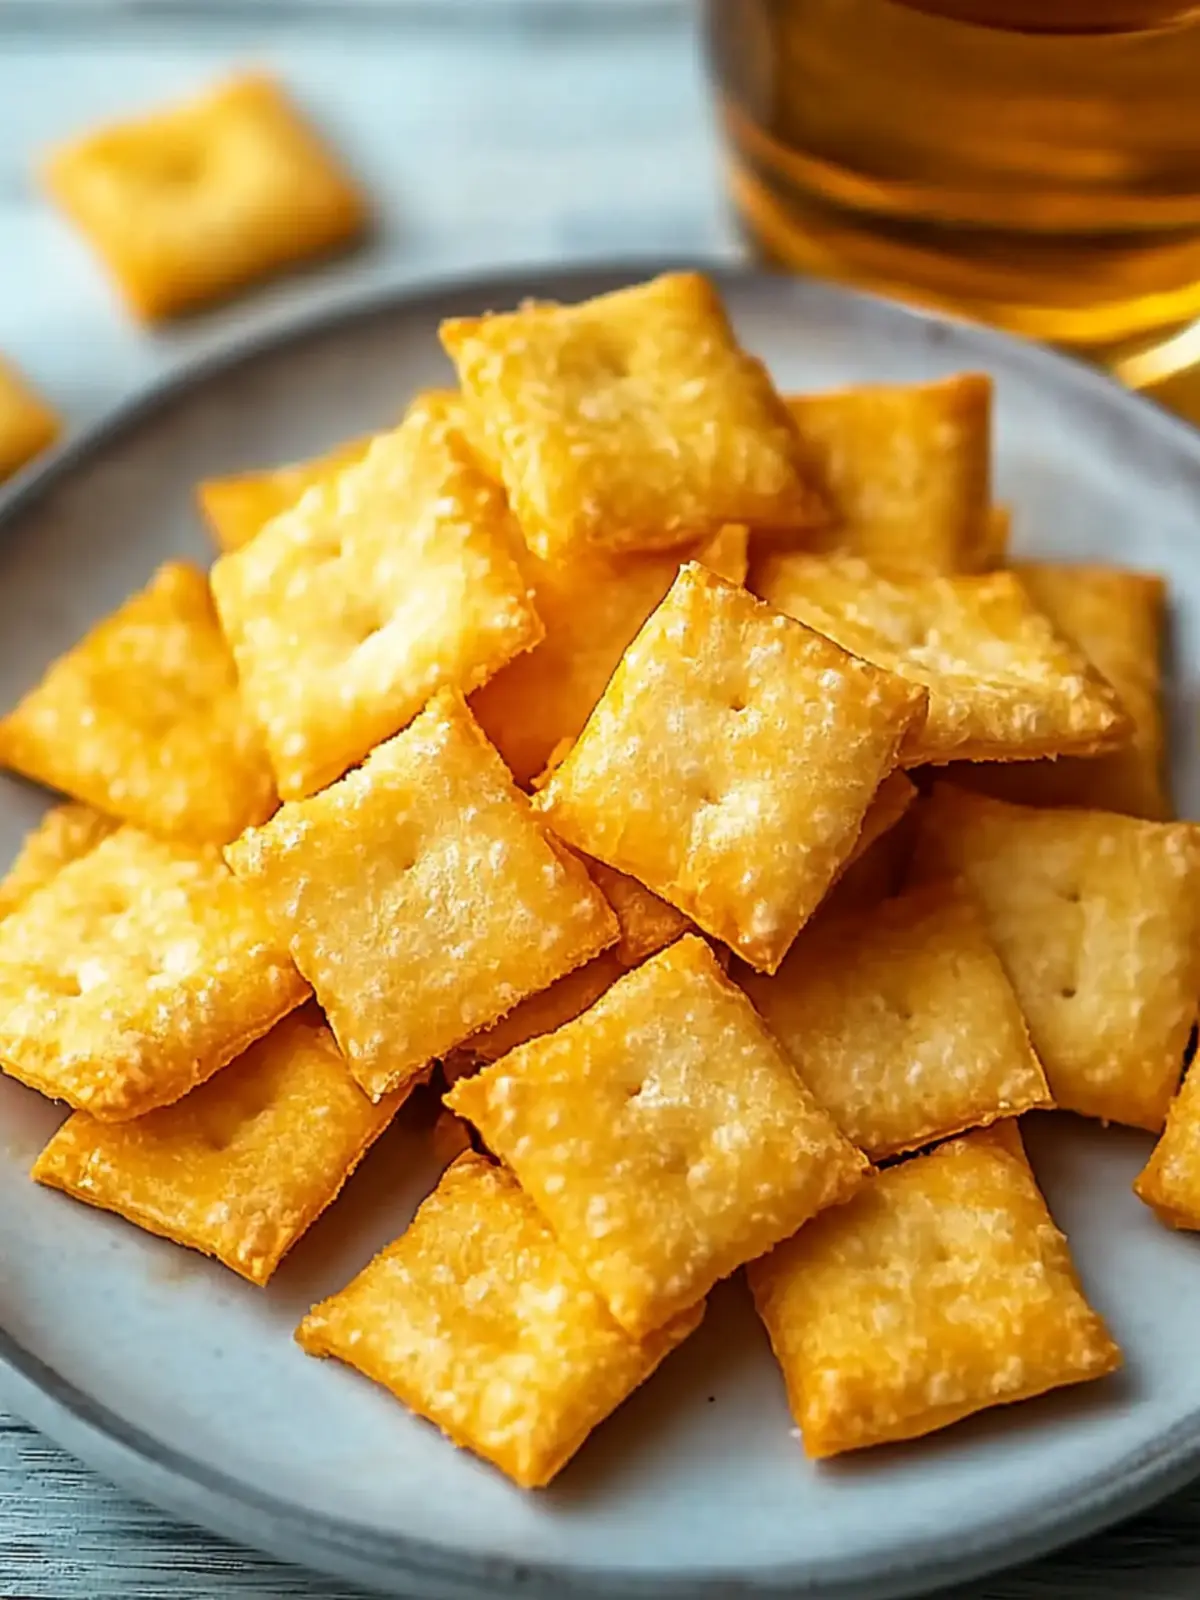
There’s nothing quite like the satisfying crunch of a snack that you can make at home—especially when it’s as cheesy and delicious as these Homemade Cheez It’s! The first time I whipped up this recipe, I was amazed by how simple it was. With just five ingredients, you can create an irresistible treat that’s not only free from preservatives but also packed with real sharp cheddar cheese.
Perfect for movie nights, gatherings, or simply when you’re craving something crunchy, this cheezit recipe brings the taste of childhood nostalgia right into your kitchen. Whether you’re a culinary newbie or an experienced chef, these customizable crackers will quickly become a favorite. Plus, with options for gluten-free flour and various cheese substitutions, everyone can join in on the fun. Let’s dive into the world of cheesy goodness that’s just waiting for you to explore!

Why is this cheezit recipe so special?
Simplicity: With just five ingredients, this recipe is both easy to follow and a great way to spark your culinary creativity.
Rich, Cheesy Flavor: Crafted with real sharp cheddar cheese, each bite bursts with flavor that surpasses store-bought snacks.
Customization Galore: Experiment with different cheeses, spices, or herbs to tailor your crackers to your taste. Try adding cayenne for a kick!
Perfect for Sharing: Whether it’s a quiet movie night or a lively gathering, these Homemade Cheez It’s are sure to be a crowd-pleaser.
Gluten-Free Options: Don’t miss out—our recipe is easily adaptable to gluten-free flour blends, making it inclusive for everyone!
Indulge in these delightful treats while you explore other fun ideas in our modern baking recipes section!
Cheez It Recipe Ingredients
• Here’s everything you need to create your own cheesy snacks!
For the Dough
- Butter – Provides richness and helps bind the dough; can substitute with dairy-free margarine for a vegan option.
- Sharp Cheddar Cheese – Offers intense flavor and a satisfying cheesiness; using high-quality cheese enhances taste and can be swapped with creamy Gouda or tangy Parmesan.
- Salt – Essential for enhancing the overall flavor; adjust to taste for a personal touch.
- All-Purpose Flour – Gives structure to the crackers; substitute with gluten-free flour blends to keep it inclusive for everyone.
- Cold Milk or Water – Moistens the dough and aids in binding; milk enhances creaminess while water can lighten the recipe.
Get ready to enjoy a fun-filled cooking adventure with this delicious cheezit recipe that is sure to please friends and family alike!
How to Make Cheez It’s
Mix Ingredients: In a stand mixer, combine softened butter, grated sharp cheddar cheese, and salt. Blend until well mixed and creamy, then gradually add flour until the mixture is crumbly.
Add Liquid: Pour in cold milk or water while mixing the dough on low speed. Mix until a cohesive dough forms. Shape it into a disc, wrap in plastic wrap, and refrigerate for at least 1 hour.
Preheat Oven: Preheat your oven to 350°F (175°C) and prepare baking sheets by lining them with parchment paper.
Roll Out Dough: Dust a clean, floured surface and roll out half of the chilled dough to about 1/8 inch thick. This thickness ensures the crackers remain crunchy.
Cut Crackers: Use a pastry cutter to slice the dough into 1-inch squares and poke small holes in the centers to allow steam to escape while baking.
Bake: Place the cut crackers on the prepared baking sheets and bake them for approximately 15 minutes, or until golden brown and crispy.
Cool and Store: Let your crackers cool on the baking sheets for a few minutes, then transfer them to a wire rack. Store in an airtight container at room temperature for up to a week.
Optional: Sprinkle with sea salt for an extra touch of flavor!
Exact quantities are listed in the recipe card below.
Cheez It Recipe Variations
Feel free to unleash your culinary creativity and make this cheezit recipe your own with these delightful twists!
- Dairy-Free: Swap the butter for dairy-free margarine and the cheese for a vegan cheese alternative for a plant-based snack.
- Cheese Swap: Use creamy Gouda or zesty Parmesan instead of sharp cheddar to explore a range of flavors. You might just discover your new favorite!
- Spicy Kick: Add a sprinkle of cayenne pepper or red pepper flakes to the dough for a delightful heat that’ll have everyone reaching for more.
- Herb Infusion: Mix in fresh herbs like rosemary or thyme to elevate the flavor profile with aromatic notes that will impress your guests.
- Texture Twist: Incorporate chia seeds or flaxseed into the dough for added crunch and nutrition that makes these snacks even more satisfying.
- Mini Cracker Fun: Roll the dough thinner and cut it into mini shapes for adorable bites perfect for kids or party platters.
- Savory Cheese Blend: Experiment with a blend of cheeses—think mozzarella combined with Parmesan—for a melty, rich experience that’s truly decadent.
- Zesty Dipping: Serve these crackers alongside homemade guacamole or spicy salsa to add a fun flavor experience to your snack time!
Make Ahead Options
These Homemade Cheez It’s are perfect for meal prep enthusiasts! You can prepare the dough up to 24 hours in advance by following the first two steps of the recipe—mixing the ingredients and shaping the dough into a disk. Wrap the dough tightly in plastic wrap and refrigerate until you’re ready to roll it out. Additionally, you can cut the crackers and freeze them for up to 3 months. Just place the cut squares on a baking sheet, freeze until solid, then store in an airtight bag. When you’re ready to bake, there’s no need to thaw; just pop them in the oven and enjoy fresh, crunchy crackers that are just as delicious and satisfying as if made on the spot!
How to Store and Freeze Homemade Cheez It’s
Room Temperature: Store your Homemade Cheez It’s in an airtight container at room temperature for up to 1 week to maintain their delightful crunch.
Fridge: You can extend freshness up to 2 weeks by refrigerating the crackers in a sealed container, though this may slightly alter their texture.
Freezer: For longer storage, freeze the crackers in a single layer for up to 3 months. Thaw before serving, and re-crisp in a 350°F (175°C) oven for about 5 minutes for that just-baked crunch.
Reheating: If your Homemade Cheez It’s lose their crispiness, simply pop them in a preheated oven at 350°F for a few minutes to restore their delightful texture.
What to Serve with Homemade Cheez It’s?
Pairing these delightful cheesy snacks with the perfect accompaniments will elevate your snacking experience.
Guacamole: The creamy texture and fresh flavors of guacamole contrast beautifully with the crunchy Cheez It’s, creating a perfect balance.
Salsa: A zesty salsa adds a burst of flavor that complements the cheesiness and enhances your snacking adventure. It’s a refreshing addition you won’t want to miss!
Veggie Platter: Crisp veggies like carrots and bell peppers add a crunchy freshness that pairs wonderfully with the rich taste of the crackers. Plus, it makes for a colorful presentation!
Herbed Cream Cheese Dip: A whipped herb-infused cream cheese dip provides a creamy, savory touch that perfectly complements each crunchy bite, making each snack feel gourmet.
Hummus: The smoothness of hummus adds an earthy depth to the sharp flavors of the crackers, offering a delightful mix of textures. It’s also a healthier option for some balanced snacking!
Fresh Cider or Lemonade: Enjoy a refreshing glass of apple cider or a zesty lemonade alongside your Cheez It’s. The sweet and tangy notes pair beautifully with the salty, cheesy goodness.
Enjoy your homemade snacks and unleash the flavor combinations that delight your palate!
Expert Tips for the Best Cheez It Recipe
Roll Thin: Aim for about 1/8 inch thickness when rolling out the dough. This ensures maximum crispiness and avoids chewy crackers.
Watch Bake Time: Keep a close eye on your crackers while baking; over-baking can turn them hard instead of deliciously crunchy.
Flavor Boosters: Consider adding spices like paprika, garlic powder, or even a sprinkle of cayenne for a more flavorful cheezit recipe.
Storage Solutions: To maintain freshness, store the crackers in an airtight container. Reheat any stale crackers in a 350°F oven for about 5 minutes for that fresh-baked crunch!
Experiment with Cheese: Don’t limit yourself to sharp cheddar; try swapping in Gouda or Parmesan for different flavors.
Homemade Cheez It’s Recipe FAQs
What kind of cheese is best for this cheezit recipe?
Absolutely! For the best flavor, I recommend using sharp cheddar cheese. It provides an intense cheesiness that really shines through. However, feel free to experiment with other cheeses like creamy Gouda or tangy Parmesan. Each will impart a unique taste and texture to your Homemade Cheez It’s!
How should I store my Homemade Cheez It’s?
To keep your crackers fresh and crunchy, store them in an airtight container at room temperature for up to 1 week. They’re best enjoyed within the first few days, but you can extend their freshness by refrigerating them in a sealed container for up to 2 weeks. Just keep in mind that refrigeration may slightly alter their texture.
Can I freeze these crackers?
Very! For longer storage, you can freeze your Homemade Cheez It’s in a single layer on a baking sheet, then transfer them to an airtight container or freezer bag for up to 3 months. When you’re ready to enjoy them, simply thaw at room temperature and re-crisp in a preheated oven at 350°F (175°C) for about 5 minutes. This will restore that delightful crunch!
What if my dough is too crumbly?
If you find your dough a bit too crumbly, don’t worry! Just add an extra teaspoon of cold milk or water, a little at a time, until a cohesive dough forms. Make sure to mix gently to avoid overworking the dough, which can lead to tougher crackers.
Are there gluten-free options for this recipe?
Absolutely! You can easily make a gluten-free version by substituting all-purpose flour with a gluten-free flour blend. Many blends work well, but I often recommend using one with xanthan gum for the best texture. Just be sure to check the packaging, as instructions may vary slightly!
What can I do if my crackers are soft after baking?
If your Homemade Cheez It’s come out a little soft, it might be due to not rolling them thin enough or baking for too short a time. To fix this, simply return them to the oven for a few more minutes until they turn golden brown and crisp up nicely. Keep an eye on them to prevent burning!
Homemade Cheez It Recipe: Snack Time Just Got Cheesy Fun!
Equipment
- stand mixer
- - Baking sheets
- - Parchment paper
- Rolling Pin
- Pastry Cutter
Ingredients
For the Dough
- 1 cup Butter Softened; can substitute with dairy-free margarine for a vegan option.
- 2 cups Sharp Cheddar Cheese Grated; high-quality cheese enhances taste.
- 1 teaspoon Salt Adjust to taste.
- 2 cups All-Purpose Flour Can substitute with gluten-free flour blends.
- 4 tablespoons Cold Milk or Water Milk enhances creaminess.
Instructions
How to Make Cheez It's
- In a stand mixer, combine softened butter, grated sharp cheddar cheese, and salt. Blend until well mixed and creamy, then gradually add flour until the mixture is crumbly.
- Pour in cold milk or water while mixing the dough on low speed. Mix until a cohesive dough forms. Shape it into a disc, wrap in plastic wrap, and refrigerate for at least 1 hour.
- Preheat your oven to 350°F (175°C) and prepare baking sheets by lining them with parchment paper.
- Dust a clean, floured surface and roll out half of the chilled dough to about 1/8 inch thick.
- Use a pastry cutter to slice the dough into 1-inch squares and poke small holes in the centers.
- Place the cut crackers on the prepared baking sheets and bake them for approximately 15 minutes, or until golden brown and crispy.
- Let your crackers cool on the baking sheets for a few minutes, then transfer them to a wire rack. Store in an airtight container at room temperature for up to a week.